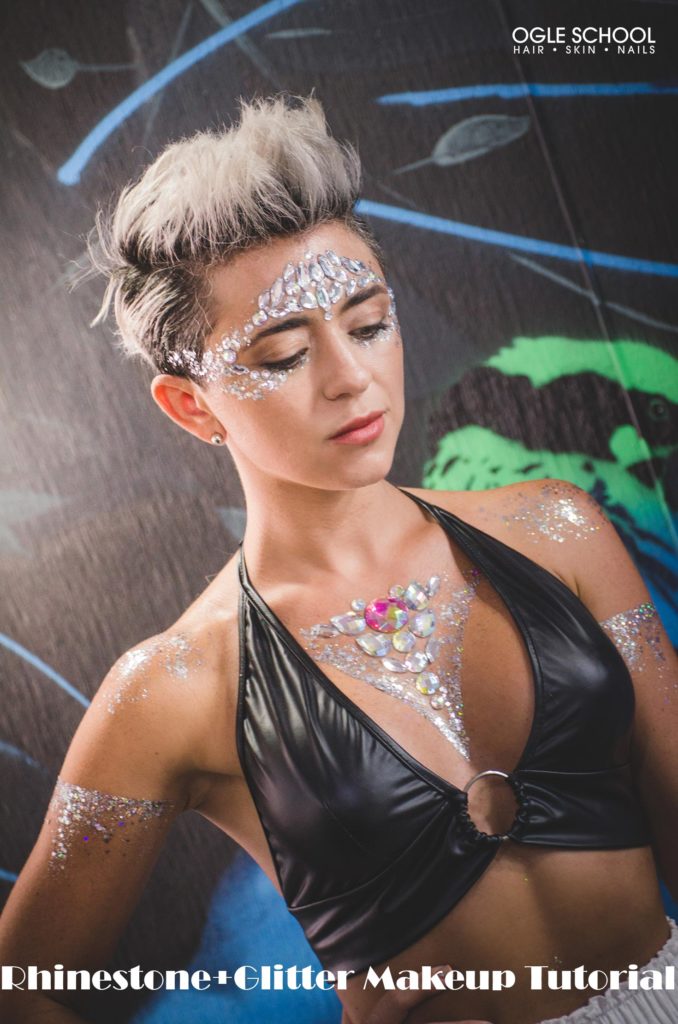
Light up the room with a sparkly display of glitter and rhinestones.
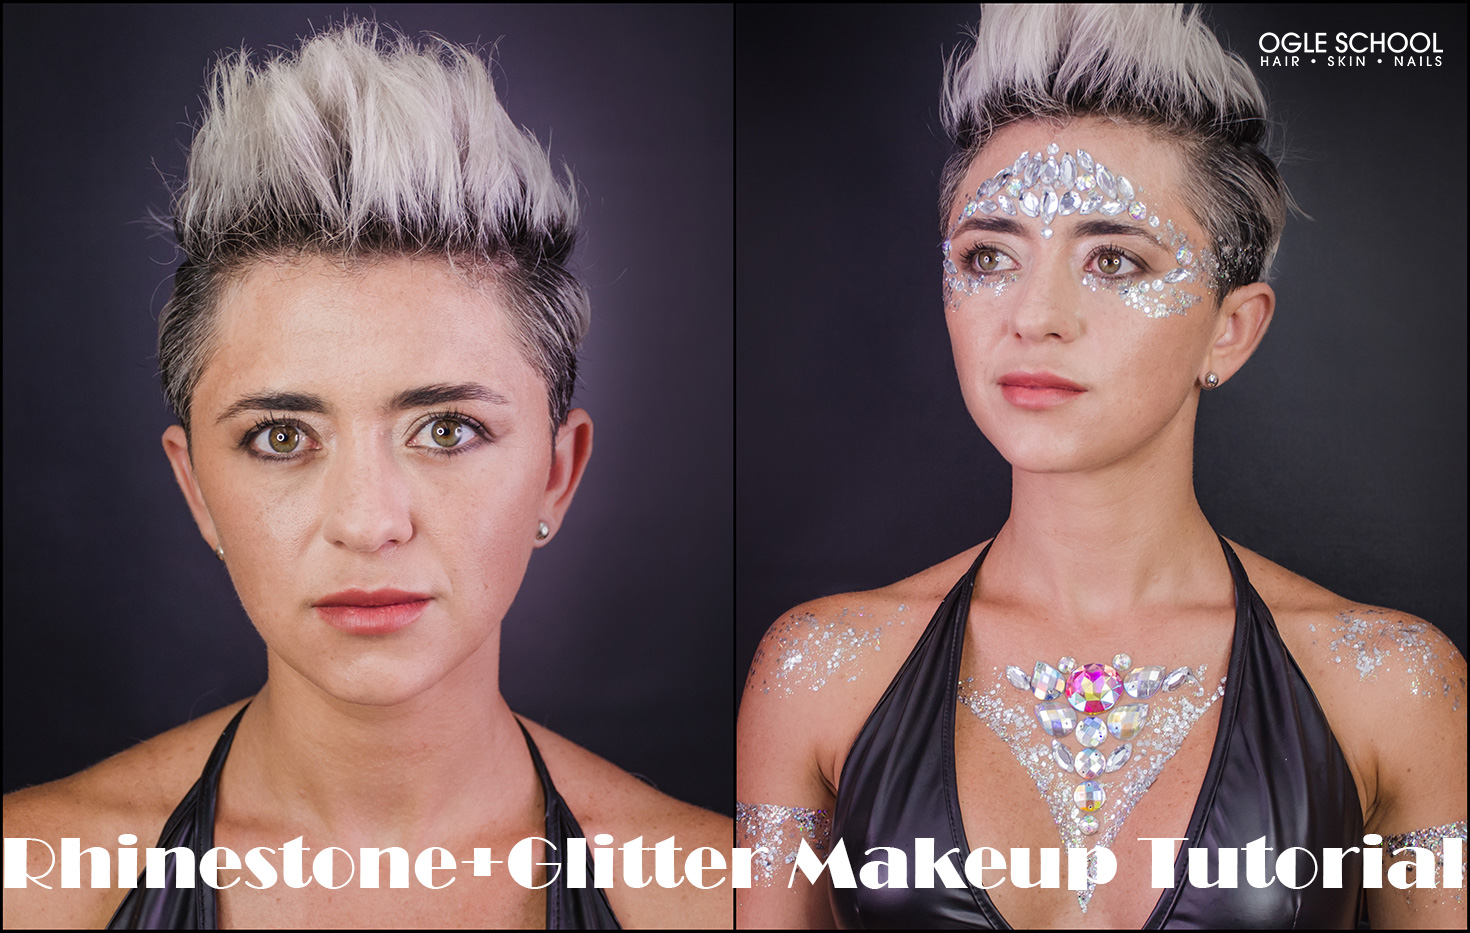
Makeup artist Maiko creatively draws on a deep understanding of costume makeup and a knack for design, demonstrating how to create a bejeweled, glimmery look using sequins, glitter, a brush, a spatula and glue. Photography by Aylen Diaz.
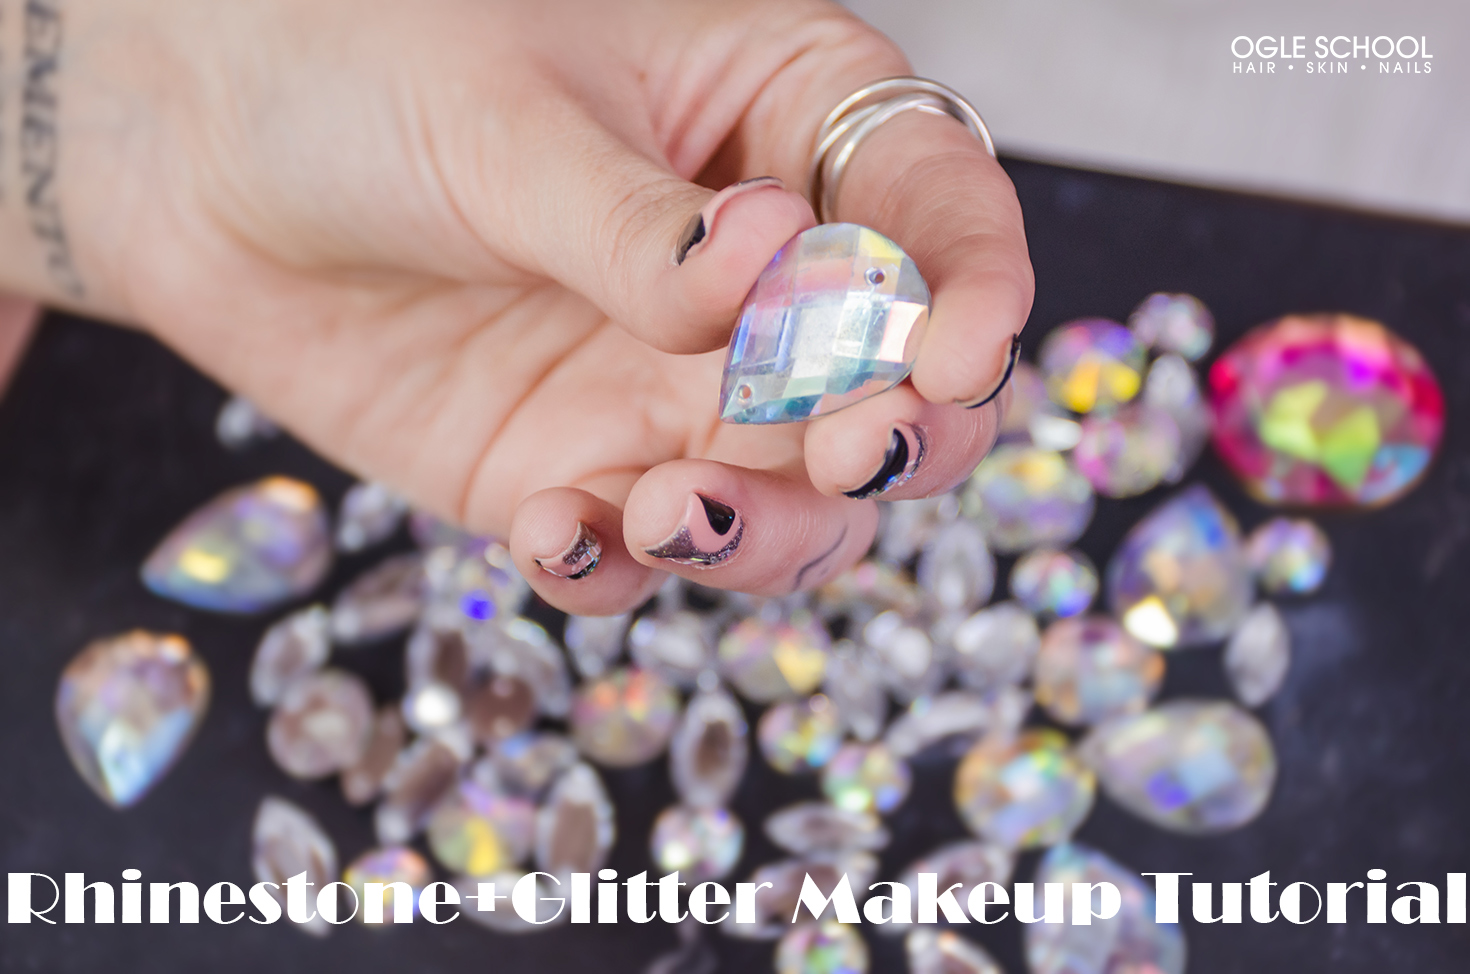
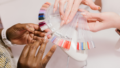
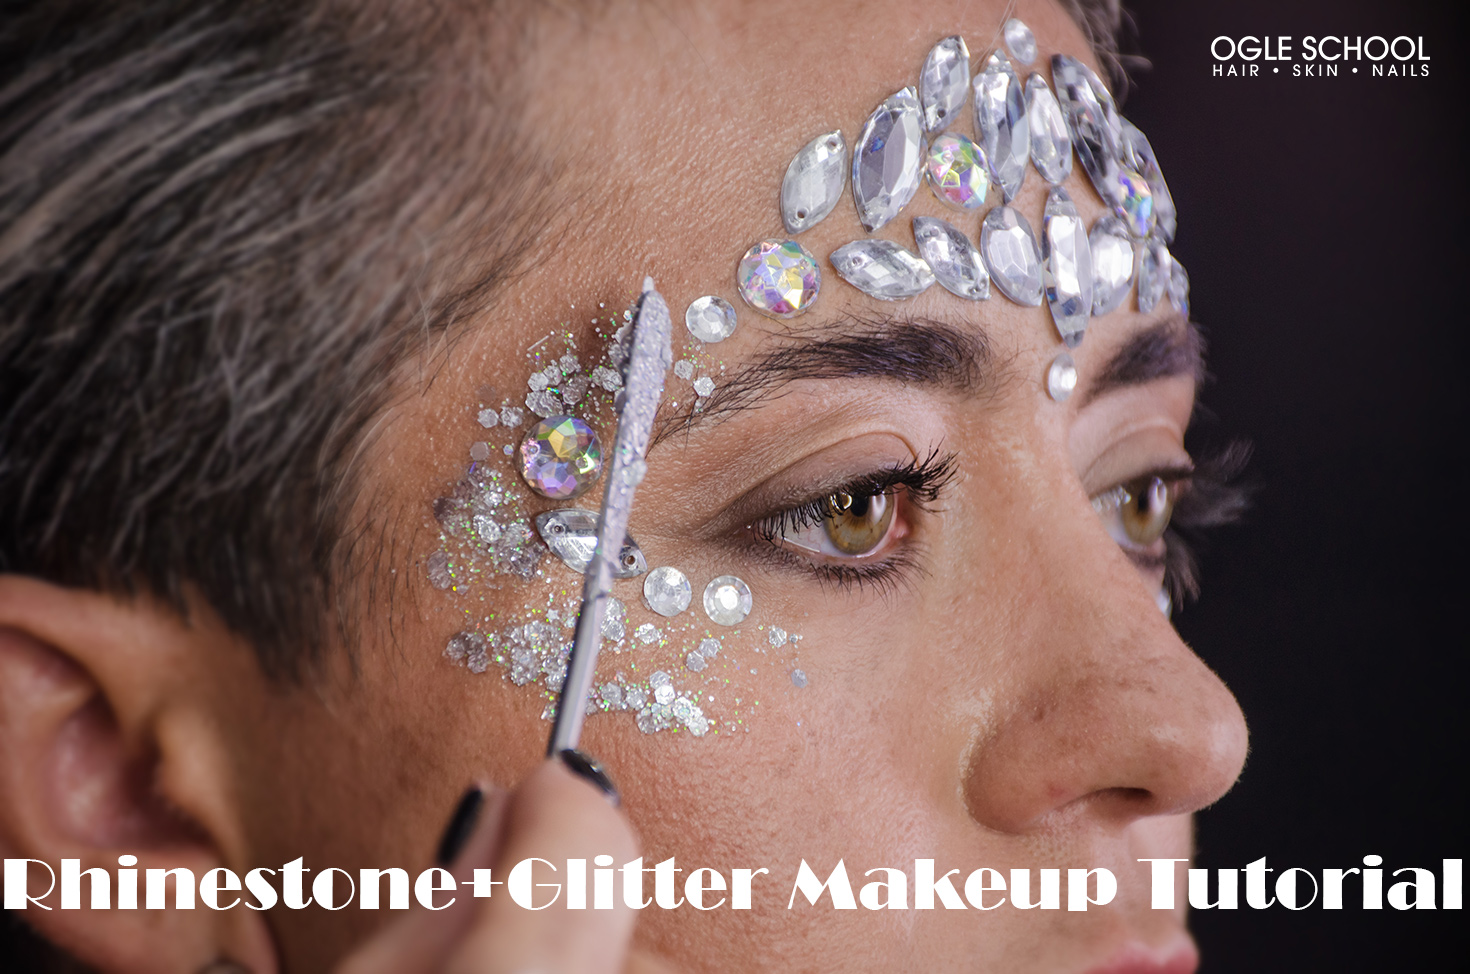
In this tutorial, we use teardrop and oval-shaped rhinestones for the application. To create an interesting design, we’re using varied silver, iridescent and holographic sizes. Reserve the larger rhinestones for the body.
First, mark your starting point in the center of the forehead with a rhinestone. The center rhinestone will help you visualize a symmetrical design.
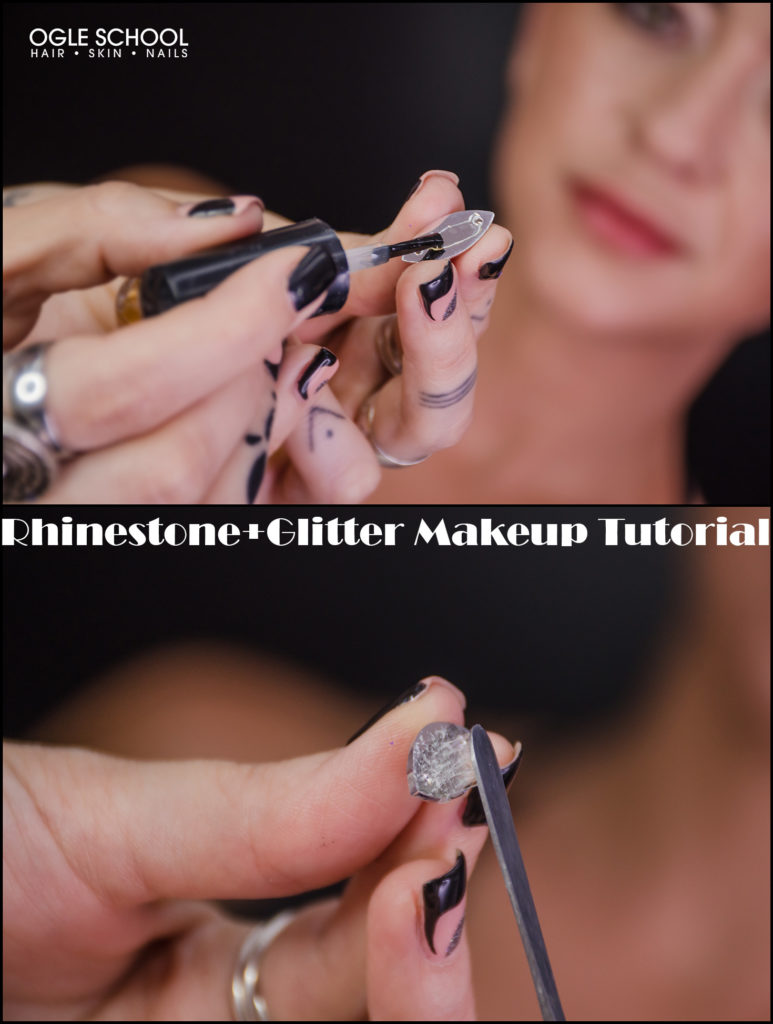
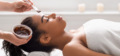
We use mastic glue for a strong adhesive that will last for hours. After applying the glue to the rhinestone, wait for two to three minutes before applying it to the skin. If the adhesive isn’t slightly tacky, it will slide off the skin.
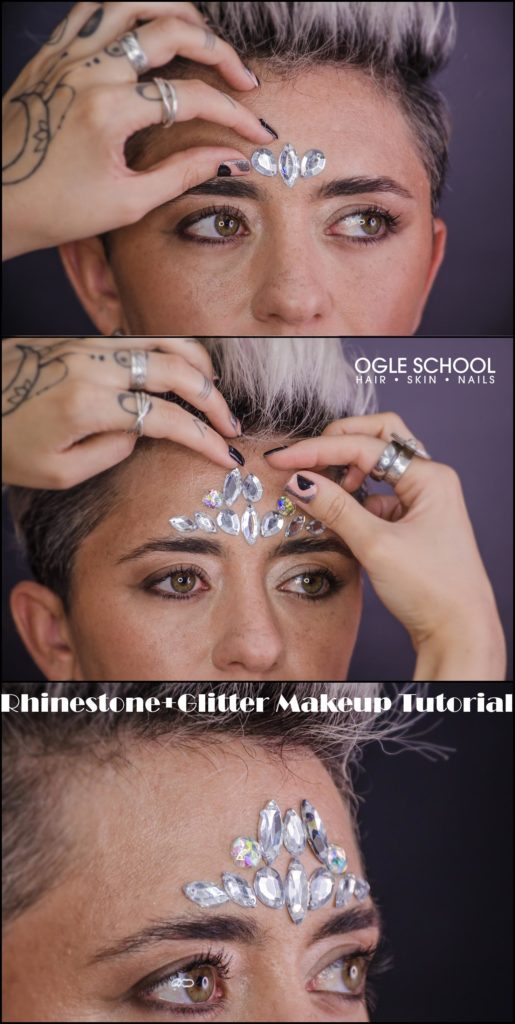
When applying the rhinestones, angle the position to follow the curve of the eyebrows. For a dynamic aesthetic, vary the size of the rhinestone and maintain symmetry.
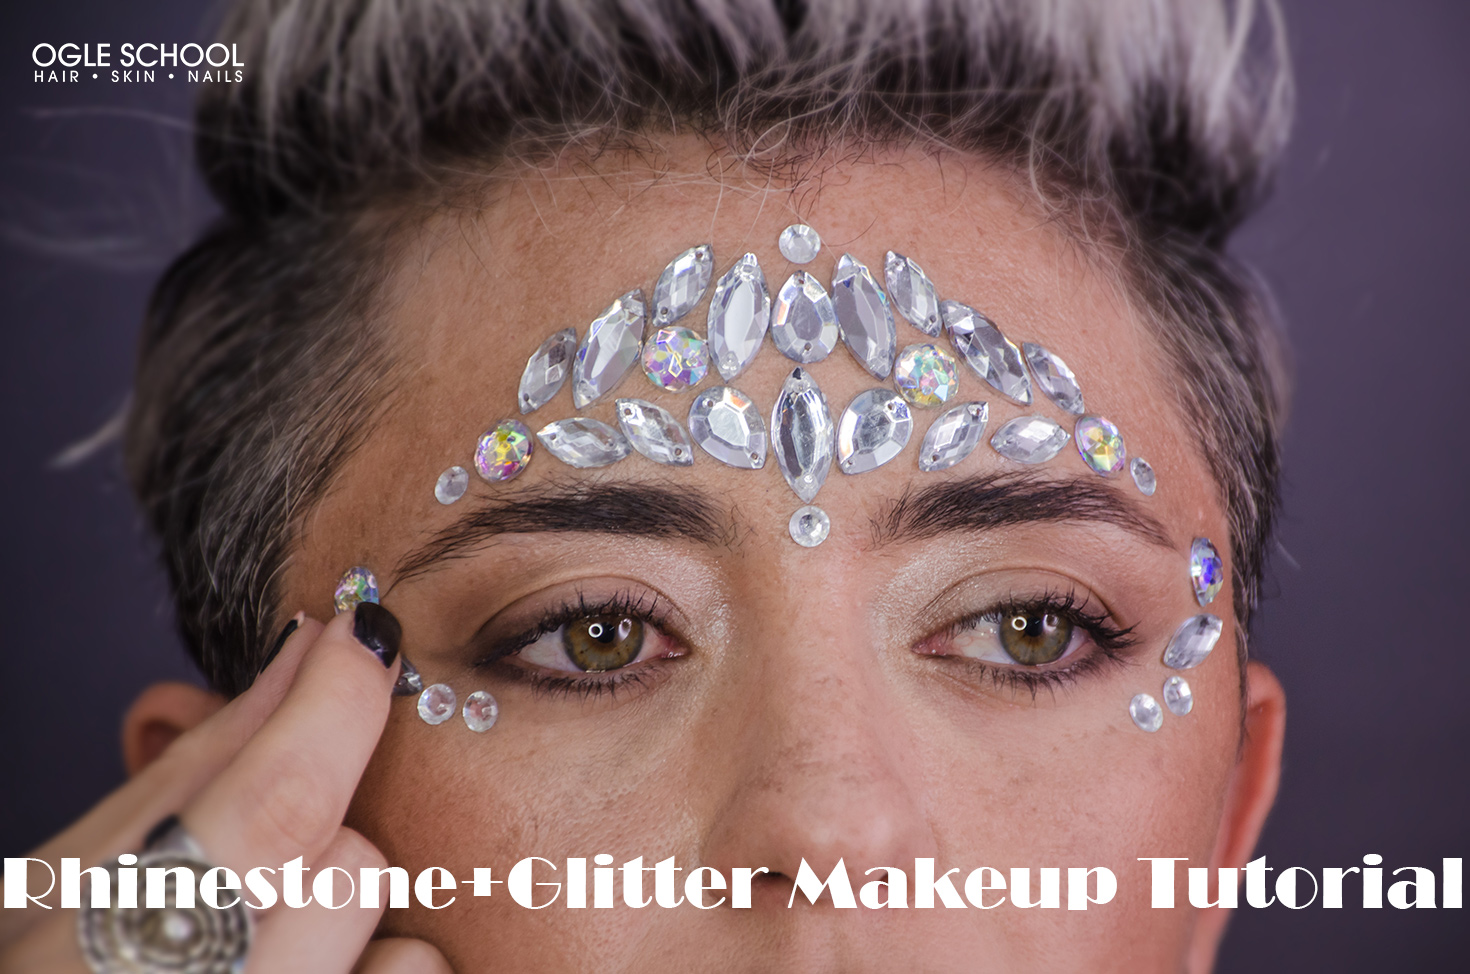
Apply smaller rhinestones from the end of the eyebrow to the lower corner lid, framing each eye.
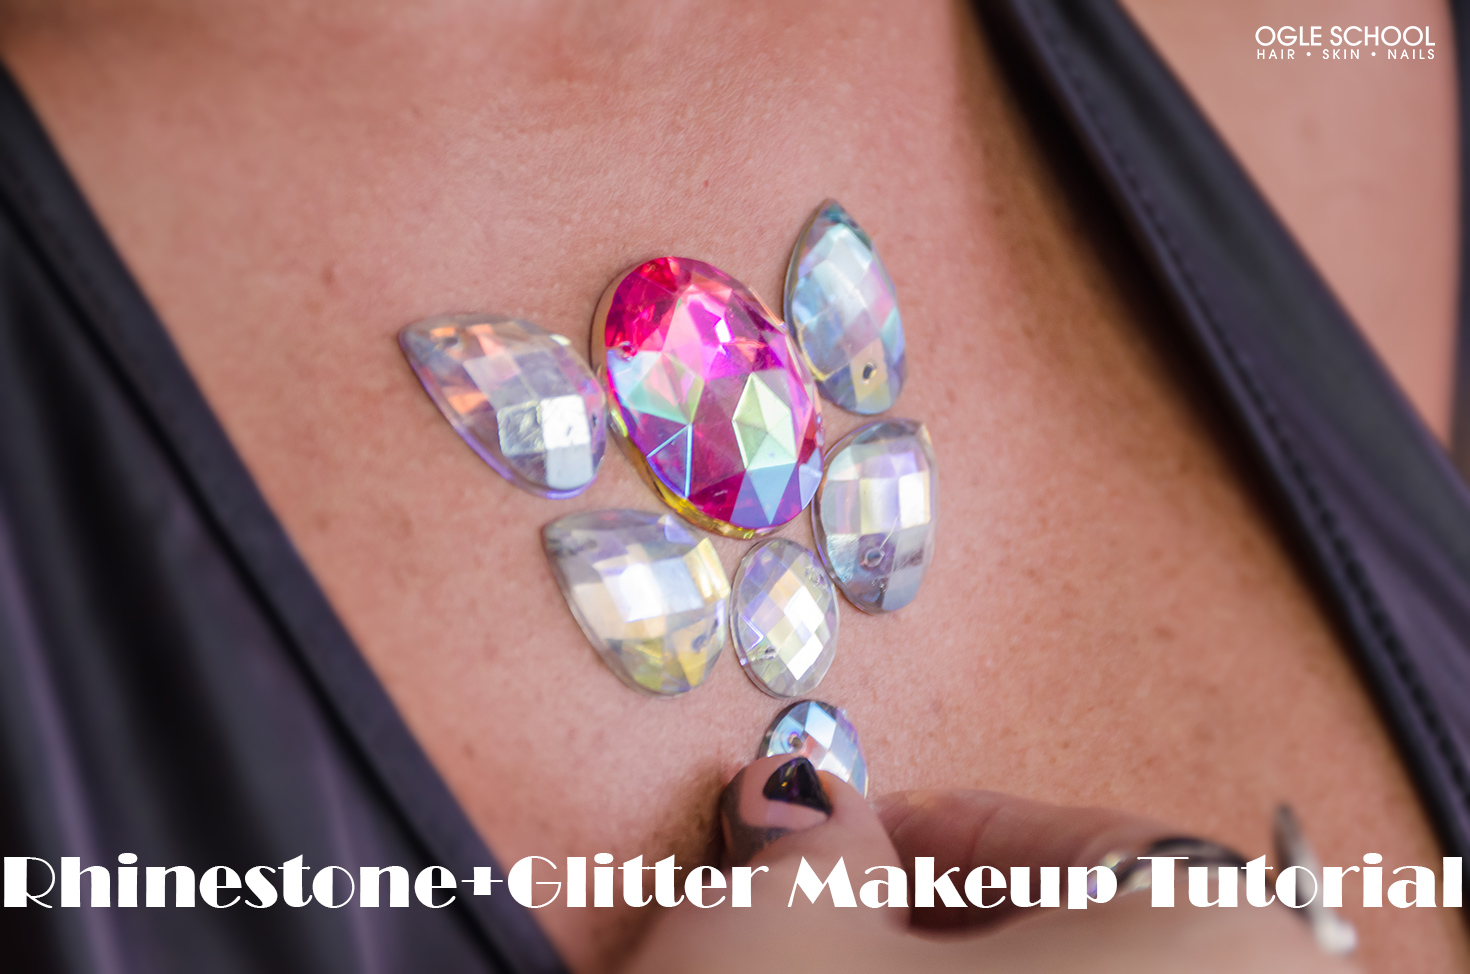
Once the face is bedazzled, use the same technique on the chest.
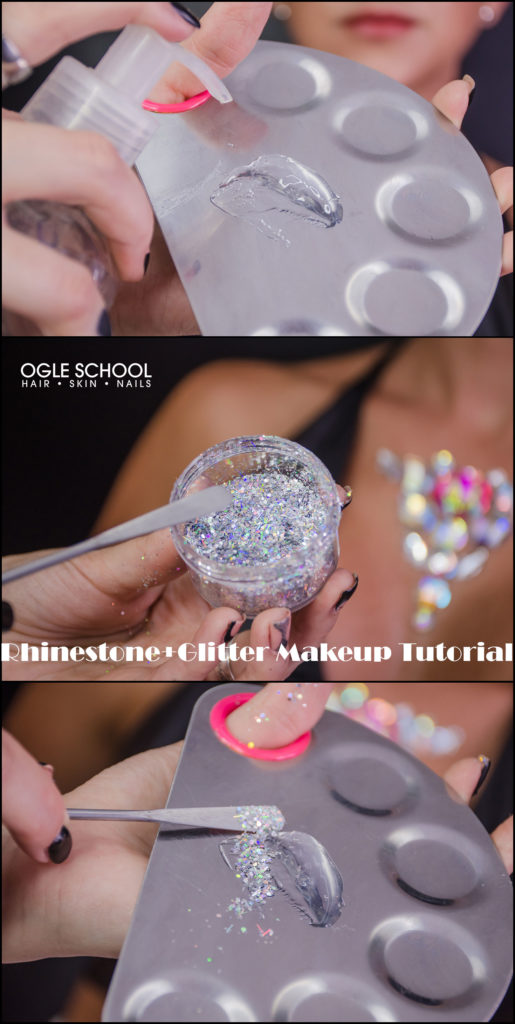
Use a neutral gel blended with glitter in equal parts to create the mixture. Use a spatula for a smooth application.
Fill in empty spaces between the rhinestones. Unleash your creativity with the finishing touches.
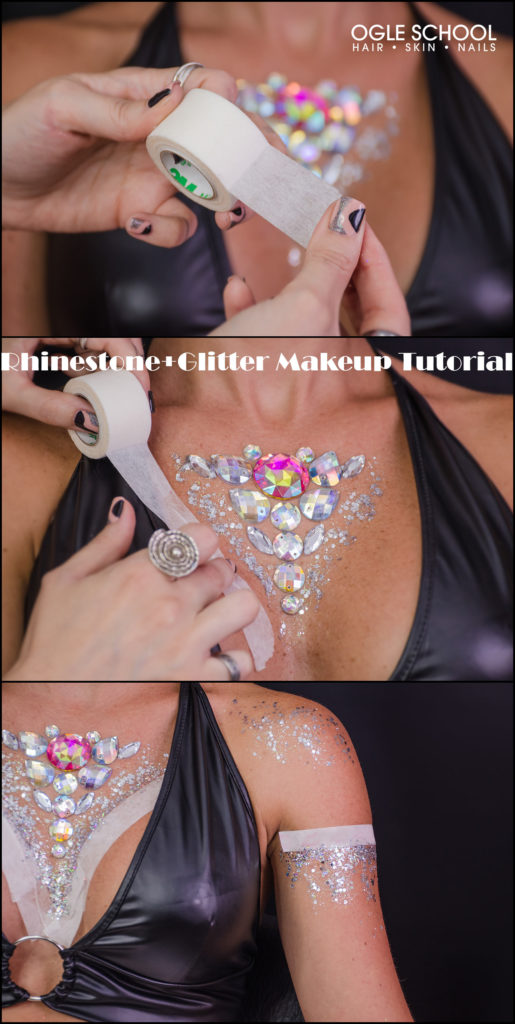
Tip: With hypoallergenic tape, you can create clean lines and angles to determine the design of your body.
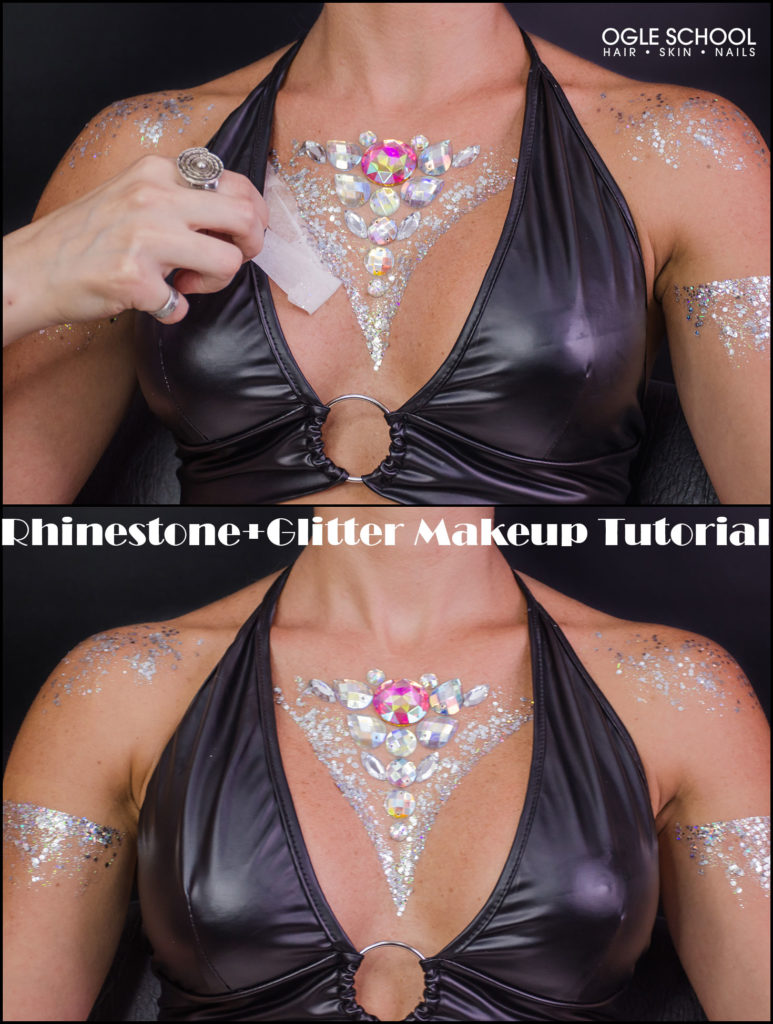
Once your shimmery masterpiece is complete, use a fixative spray to stabilize your work.

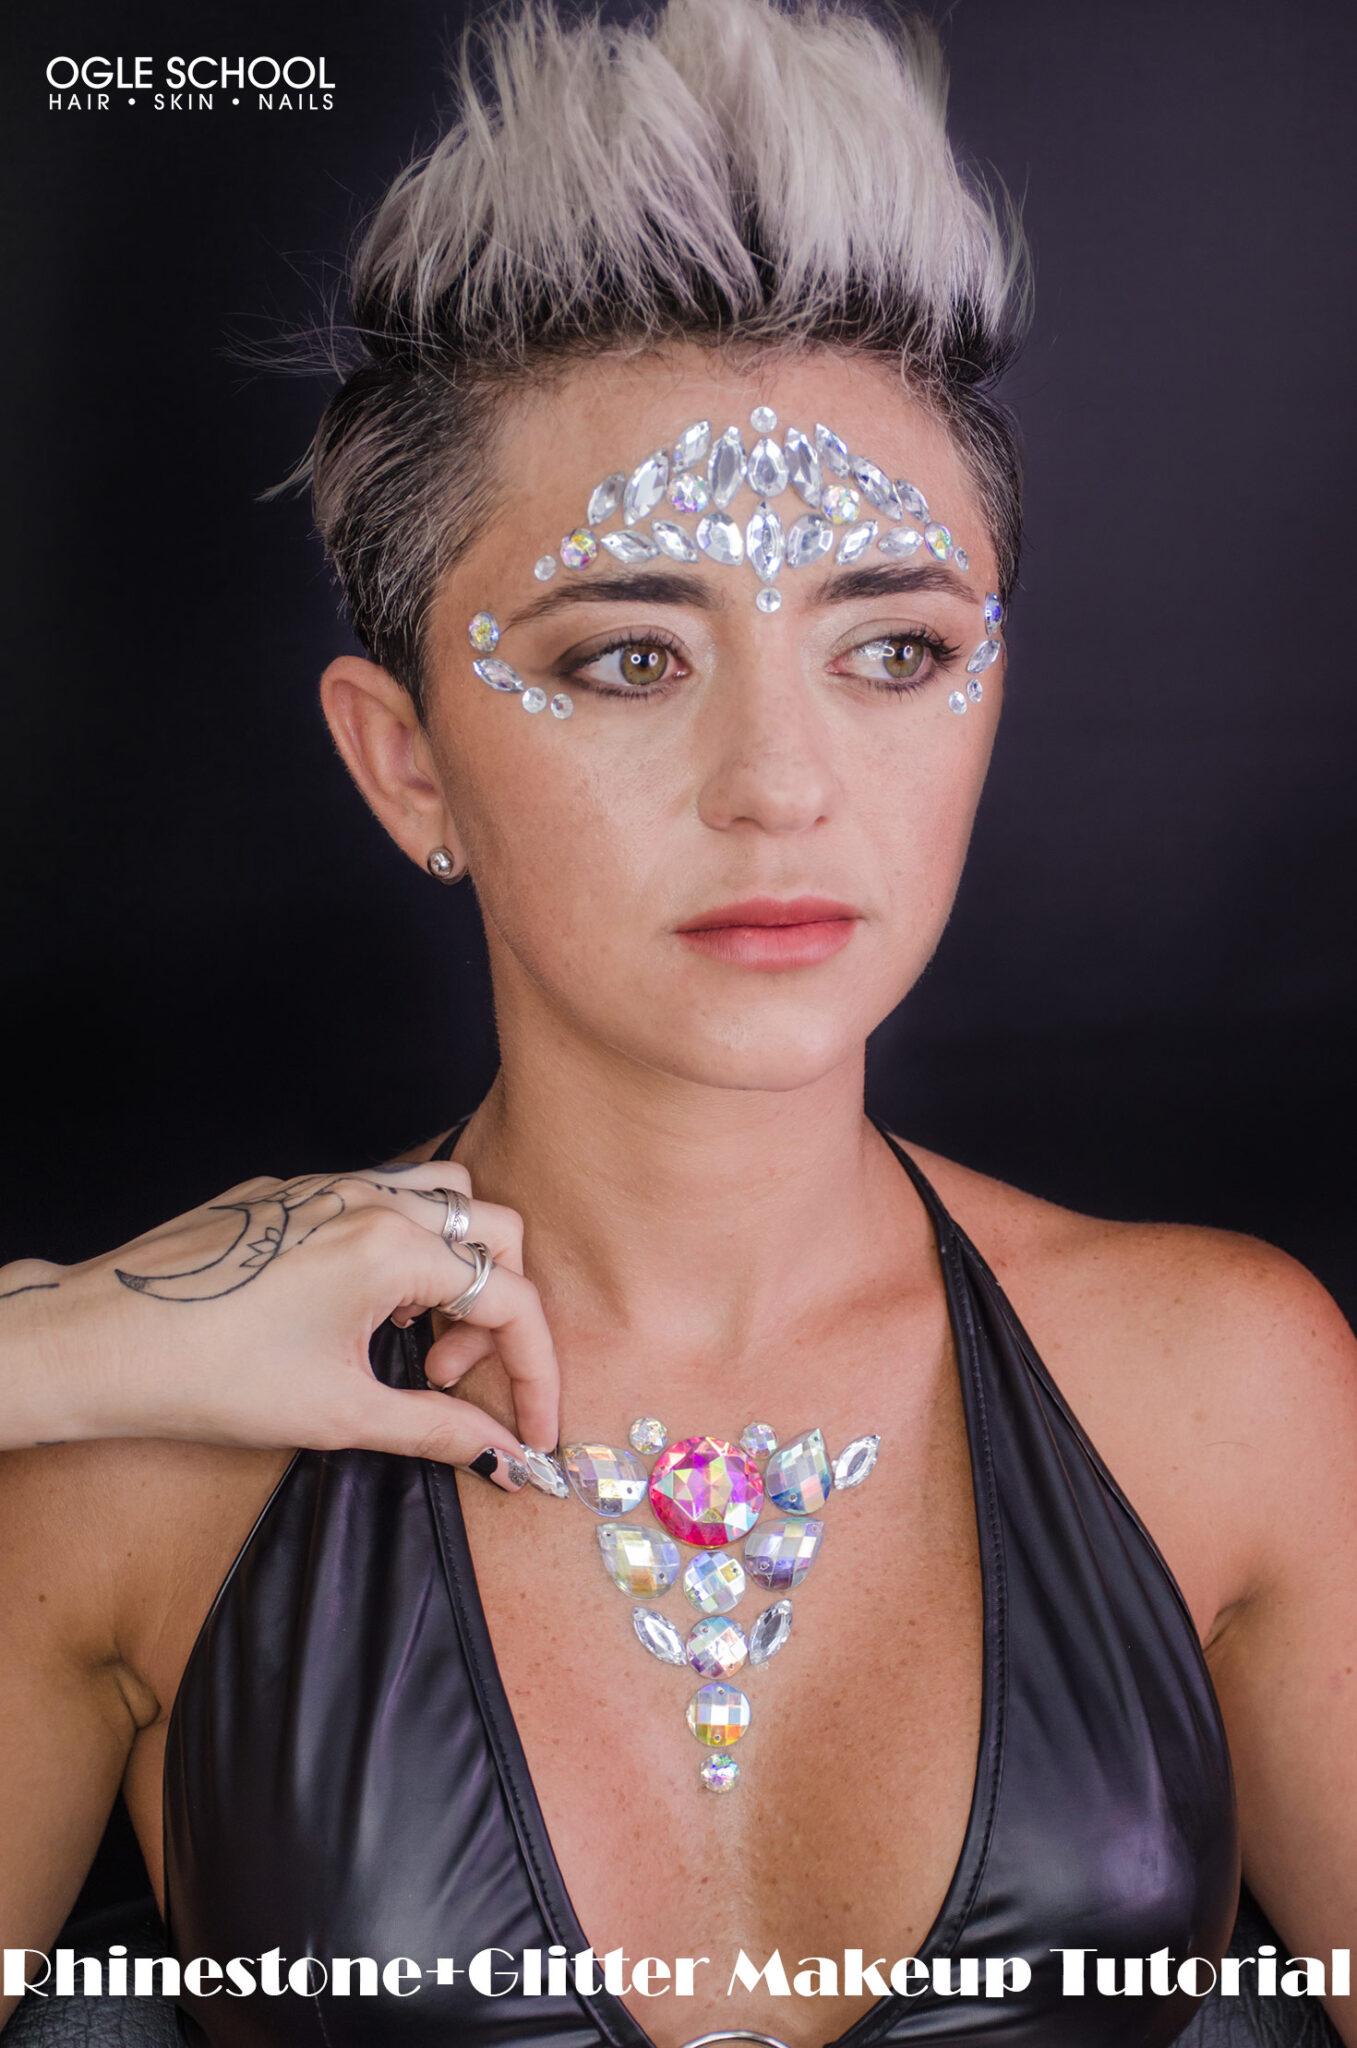
Here’s the stunning, head-turning look!
For more signature and striking looks, visit Ogle School Blog. Discover all of the opportunities of being a beauty school student by requesting more information.