On this page
At a Glance
The French braid is a timeless, versatile style that works for everything from workouts to polished everyday looks. Our seven-step guide walks through everything from parting and sectioning to tension control, blending, and finishing with product. Starting with slightly unwashed hair gives the braid better grip, and keeping the strands close to the scalp creates a cleaner, more structured result. For a modern 2026 finish, our experts recommend tighter tension near the front for structure and looser tension at the crown for a softer, more romantic effect.
Have you always wanted to create a French braid but felt daunted by the task? Not to fear—our team of professionals can guide you step by step through any process that is hairstyle-related. The French braid is a timeless classic that can be trendy, athletic, chic, low‑maintenance, and perfect for day‑two hair. It’s ideal for workouts, camping, summer heat, or simply keeping your hair neat and polished.
French Braid before and after:
Learn how to create French braids pictured in the before-and-after.
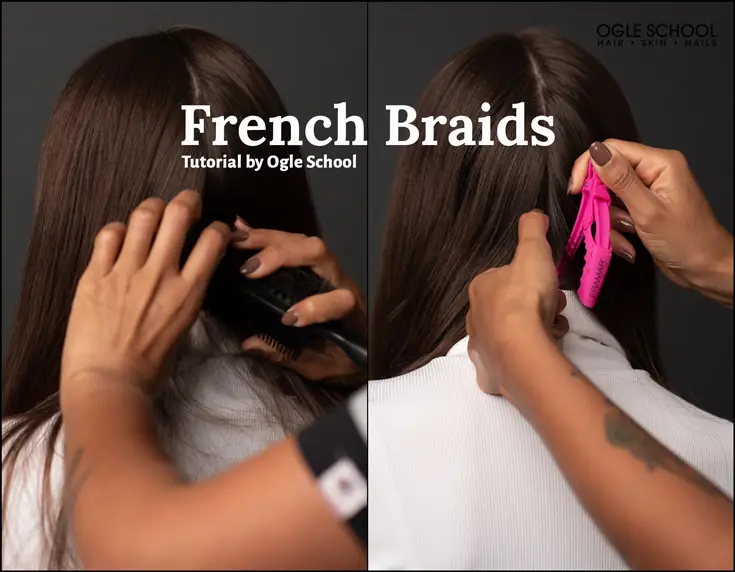
Step 1: Comb and Part the Hair
Start with slightly unwashed hair for better braid grip and texture.
Using a comb or detangling brush, smooth through the hair and create a clean center or side part from the hairline to the crown.
Tip:
If your hair is too clean or silky, mist lightly with texturizing spray or dry shampoo for hold.
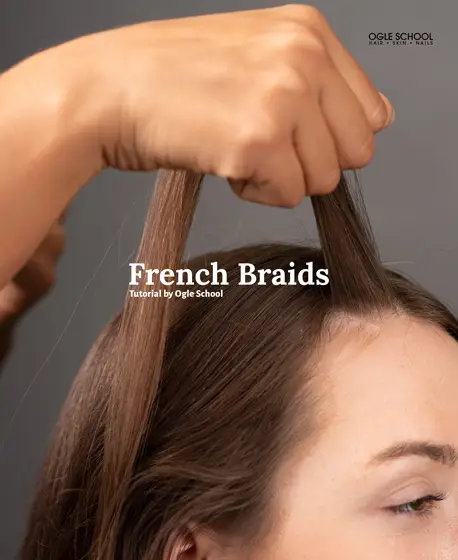
Step 2: Gather Three Sections of Hair
Gather three separate sections of hair and stretch downward until all three are close to the head and taut. If you attempt to braid the sections away from the head, the
Section off three even strands at the top of your head, pulling downward until each is taut and anchored close to the scalp.Why this matters:
Braiding away from the head makes the braid look loose, messy, and uneven.
Tip:
To keep your braid neat, add small, even sections of hair each time you cross a strand.
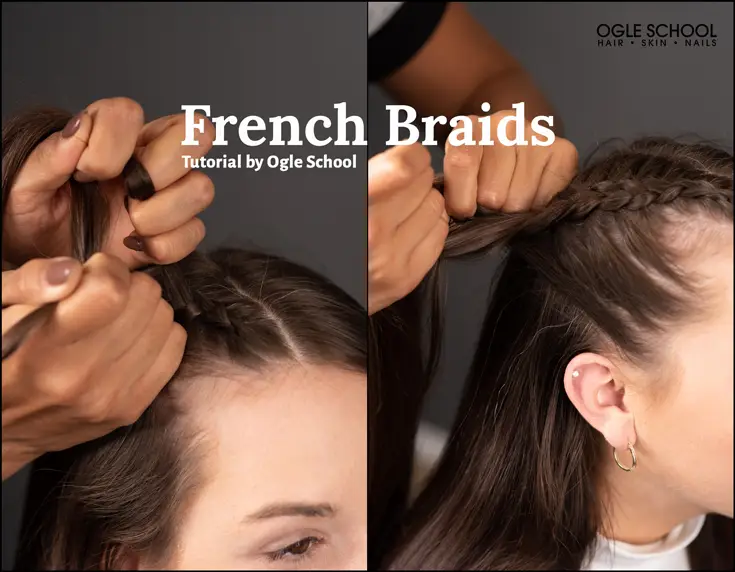
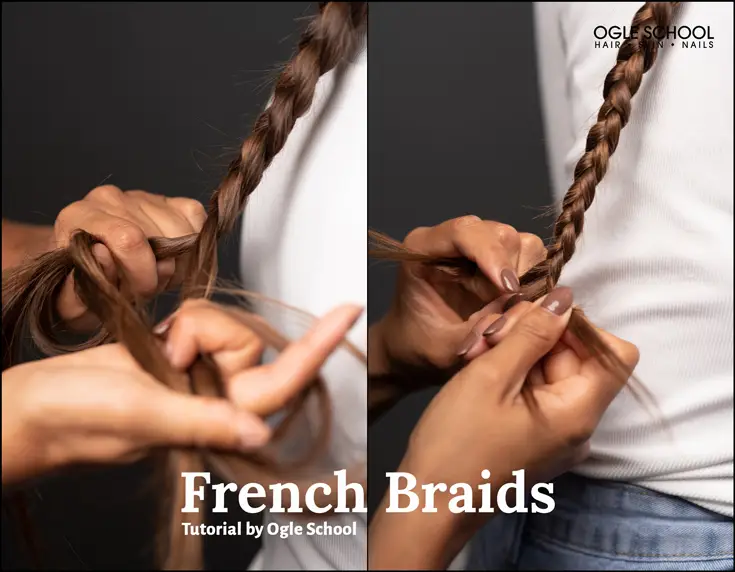
Step 3: Begin the French Braid Pattern
French braid from the temple:
To start the braid:
- Cross the left section over the middle.
- Cross the right section over the middle.
- Repeat while adding new hair to each side.
External reference:
👉 https://www.vogue.com/article/how-to-maintain-your-boho-braids
Each strand should remain uniform in thickness for a smooth, polished braid.
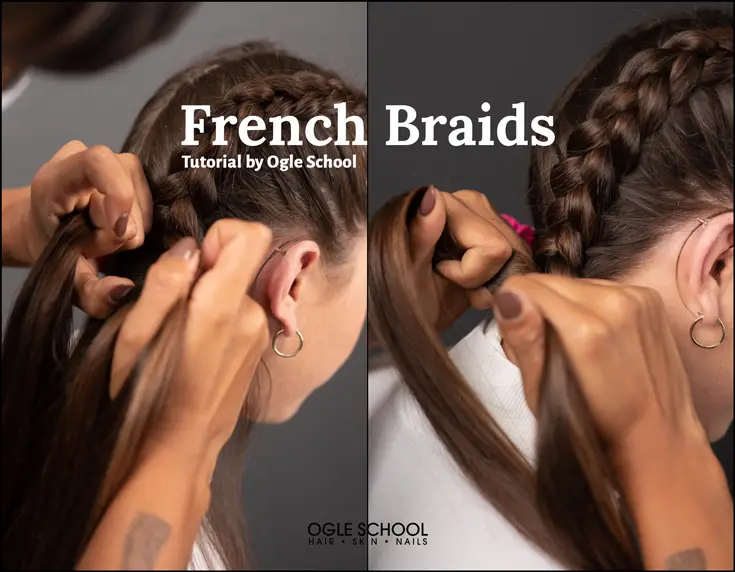
Step 4: Control the Grip & Tension
The tighter you hold the strands, the tighter the braid. For a modern 2026 look, aim for:
- Tighter near the front for shape and lift
- Looser near the crown for a soft, romantic finish
Continue braiding close to the head, pulling in strands evenly on both sides.
Step 5: Finish the Braid
Once you reach the nape of the neck and have incorporated all your hair, continue a standard three‑strand braid.
If you prefer:
- Tight & sleek: keep your hands [close to the braid]
- Full & boho: keep your hands [slightly farther away for a thicker appearance]
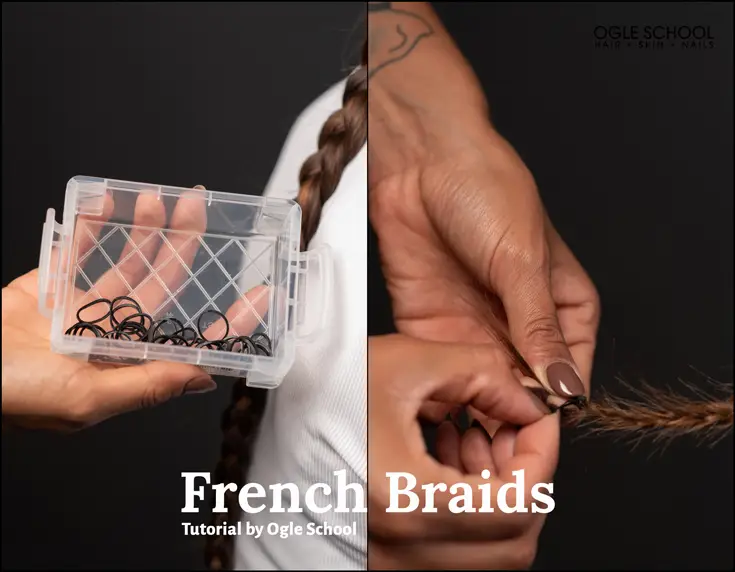
Step 6: Secure the Braid
Use a rubber band or hair elastic to secure the braid.
If you’d like loose, natural hair at the tips, tie the band a few inches above the ends and gently pull the braid apart (pancaking) for volume.

Step 7: Style With Product
Finish with a holding product:
A quality salon styling product will help complete the look of a French braid. Finish with a holding styling product for a long-lasting French braid and lustrous-looking finish.
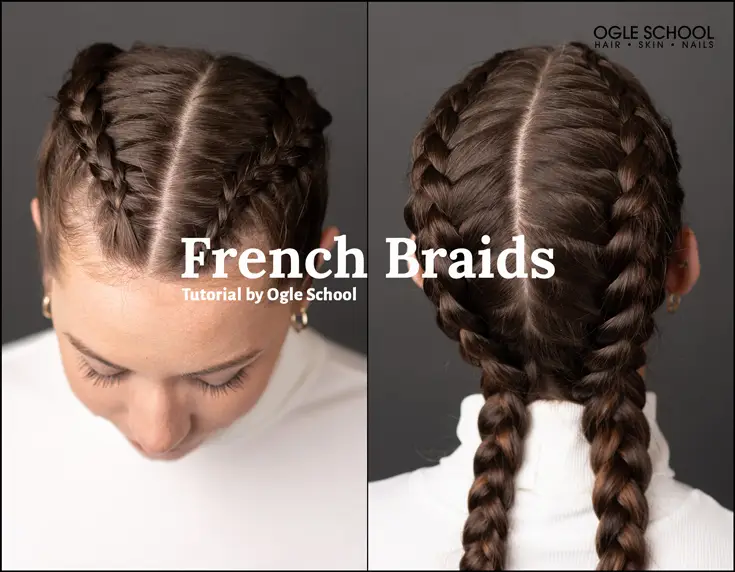
The Final Look
The finished look is stunning and polished looking. These plaits are on the tighter side. If you’re looking for looser tendrils around the face and a loose braid overall, that can still be achieved with French braids. If you want to take your skills to the next level, consider enrolling into our cosmetology program. Our admissions team is ready to help assist you in taking the first step towards a rewarding career in the beauty industry.
For more hair inspiration, visit our blog at Ogle Hair School Blog.
What is the easiest way to start a French braid for beginners?
The easiest way to begin a French braid is to start with slightly unwashed hair, comb it smooth, and create a clean center or side part. Beginning with three even sections at the crown gives you a strong, anchored base that’s much easier to control as you add hair down the head.
Why is slightly unwashed hair better for French braids?
Slightly unwashed hair has natural grip, making it easier to hold sections and keep the braid tight. If your hair is freshly washed or slippery, adding a bit of texturizing spray or dry shampoo provides the friction needed for a clean, secure braid.
How do I keep my French braid neat and even?
Keep your braid neat by adding small, even sections of hair each time you cross a strand. Pulling hair in unevenly can create bumps, loose tension, and an uneven pattern, while consistent additions create that smooth, polished French‑braid look.
What’s the right amount of tension for a French braid?
For a modern 2026 look, keep the braid slightly tighter near the front for lift and structure, and looser near the crown for a soft, romantic finish. Managing tension this way creates shape without making the braid overly stiff.
How do I finish and secure a French braid?
Once you reach the nape of the neck, switch to a standard three‑strand braid and secure it with a hair elastic. For a sleek look, keep your hands close to the braid; for a fuller, boho finish, hold your hands farther away and gently “pancake” the braid to add volume.
What products should I use to make my French braid last longer?
A light‑hold texturizing spray or dry shampoo at the start adds grip, while a finishing spray keeps the braid smooth and in place. A lightweight serum also helps control flyaways for a polished, salon‑quality finish.
Can beginners learn to French braid quickly?
Yes—French braids are beginner‑friendly with a clear step‑by‑step method: part, section, cross, add hair, repeat. Practicing consistent parting, tension, and section sizes helps beginners improve quickly, often in just a few tries. Ogle School teaches it’s students how to master this look.
How do I add volume to a French braid without making it messy?
After securing the braid, gently “pancake” the outer edges by pulling them outward a little at a time. This technique adds fullness while keeping the braid structured and clean.
What tools do I need to create a French braid?
You’ll need a comb or detangling brush, optional dry shampoo or texture spray, a hair elastic, and a lightweight finishing spray or serum. These basics are all you need to build a salon‑quality braid at home.