On this page

There was a time when hair artists would showcase only the final product of their work sans work-in-progress documentation. Now the before, in-progress and after documentation is what engages the audience. Watching a master at work can be almost as interesting as seeing the finished style.
There’s an art to filming and editing the process and many ways to approach it. This guide will give you a crash course on creating a well-executed before-and-after video.
Setting the Stage
Attribution: @lora_arellano
Lighting
Lighting is one of the most important things, so make sure it’s good. You want to flatter the client and have a clear image of the before-and-after video. Many editing programs, like Premiere, can help enhance the lighting in videos, but the best way to create a beautiful and consistent image is to get the lighting conditions right in the pre-production stage. Many people argue that natural lighting is the best. If you’re documenting inside a salon, find a place by a big window. Have your client or model do a line of poses outdoors to showcase the hairstyle or makeup. If the natural lighting conditions aren’t ideal, you can find other lighting sources. Industry-standard lighting isn’t necessary.
Thanks to the stay-at-home orders at the beginning of the pandemic, ring lighting became popularized mainly for zoom calls. With ring lights, you can significantly dial it up. The light brightens the client’s face and gives the overall video a more polished look. Moreover, it’s easier to take good-quality footage into an editing program and enhance it than take low-lit, poor-quality videos and try to correct the lighting.
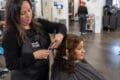
Camera
Attribution: @caroline.anythingbutbasic
Consider what type of camera you will use. Using your phone is perfectly fine. A handheld video camera also works as long as you have a steady hand and there are no quickfire zoom-ins and zoom-outs.
When the camera is too close to the subject, that can feel a little claustrophobic for the viewer. Step back and strive to always capture before-and-after photos from the same vantage point. The exception is if you’re doing a close-up to focus on the details.
Action
Is there a story behind the before-and-after video? Are you documenting the whole process, from discussing the client’s desires to completing the style? If so, always have questions ready for your client:
- Does the client know exactly what they want or just want something new?
- Does the client want a wash-and-go cut?
- Are you going to be making suggestions to manage expectations?
Repost client videos that show a before, during and after video shoot that frequently appear on TikTok or Instagram.
Consider the venue you’ll be sharing this with and the appropriate format. For instance, if you are sharing a live event, you have the freedom to make the video longer and more improvisational. If you are communicating to your Instagram stories, typically, you would need a compelling short video.
With Instagram feeds, you have the option to do short or longer videos. You can also use the old “swipe to see the before picture” on your feed as a caption.
Treat each shot equally in terms of the time you take to capture your work. The hairstyle might come and go, but its documentation can live on forever on your online portfolio.
Making the Video
Attribution: @themanemichael
This before-and-after video is a fantastic example of creating a distilled step-by-step demonstration of giving a client a trifecta of colorful hues for Halloween.
First, the video shows a clip of the blonde hair, pre-styled, as a setup shot. Next, the video pans the client’s wet hair followed by three different hair dyes—green, pink, and orange. The hairstylist includes the in-progress processing clip before revealing the result. The last shot is the complete transformation—the hair fully styled and festooned with batty ornaments to go with the theme of the music and captions.
Here are some great guidelines to follow and check off when making a video of the in-progress hairstyle that requires coloring and styling:
1. Before Video
Set up the shot of the subject before coloring or styling by showing different angles of the client’s hair. Comb through the client’s hair with a comb or fingers, or shake it with your hand to show the texture of the hair.
2. Mixing Products (include all products)
Include an in-progress shot of mixing the developer with pigment for all colors. Once the developer is fully blended, share each color before applying.
3. Application
The demonstration can be just as compelling as the final result. Apply the color to the hair. Repeat the process with each hue. Zoom in to focus on the application and zoom out to see the stylist at work.
4. Processing
Add a clip of the client waiting for the hair to process. This clip bridges the before-and-after portion of the Video, so shoot from all angles to help build anticipation for the big reveal.
5. Rinsing
Zoom into the client’s hair while rinsing the excess color out. Show a wide angle of the salon and the client’s hair when it’s towel dried before the styling begins.
6. Styling
When styling the hair, be careful not to fluff too much—this technique shows off the style in person, but it won’t translate on camera. Instead, let the hair flow down naturally against the neck, shoulders and back. If you’re using products you want to promote, zoom into the product label before or after using them.
7. Final result
Incorporate all angles of the final look. Show clips of you and your client smiling and happy to conclude the video so that the viewer knows that you’re confident with your work and you have a satisfied client.
To find more Ogle School tutorials relevant to cosmetology and esthetics, check out our blog posts here.