Learn to Dutch braid your hair with these simple steps.

Style your hair for any occasion with a Dutch braid/wrap-around ponytail. Styled by Filosofia Peluqueria. Photographed by Aylen Ile Diaz.

The hair’s initial preparation will depend on the style you want to achieve: straight ironed hair, curly locks or au natural.

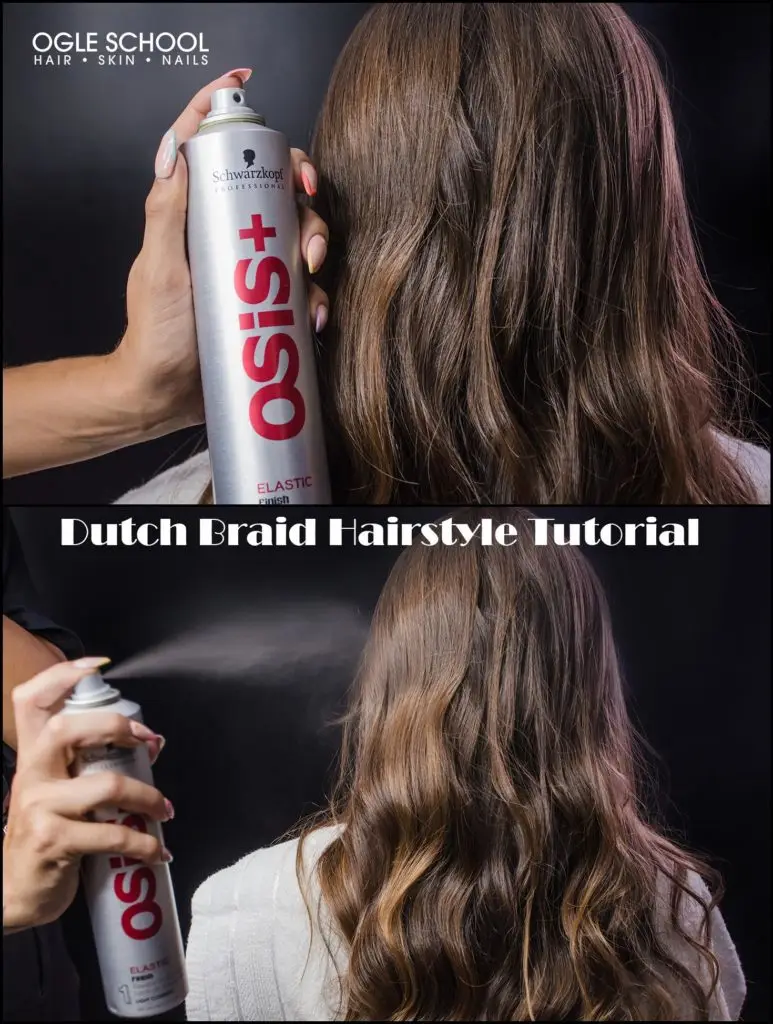
Start by detangling your hair and spraying lacquer on the crown of the hair. If you want full curls, use your curling iron first before braiding.
Gently comb curls until hair is left with soft curls and prepare the hair with holding lacquer.
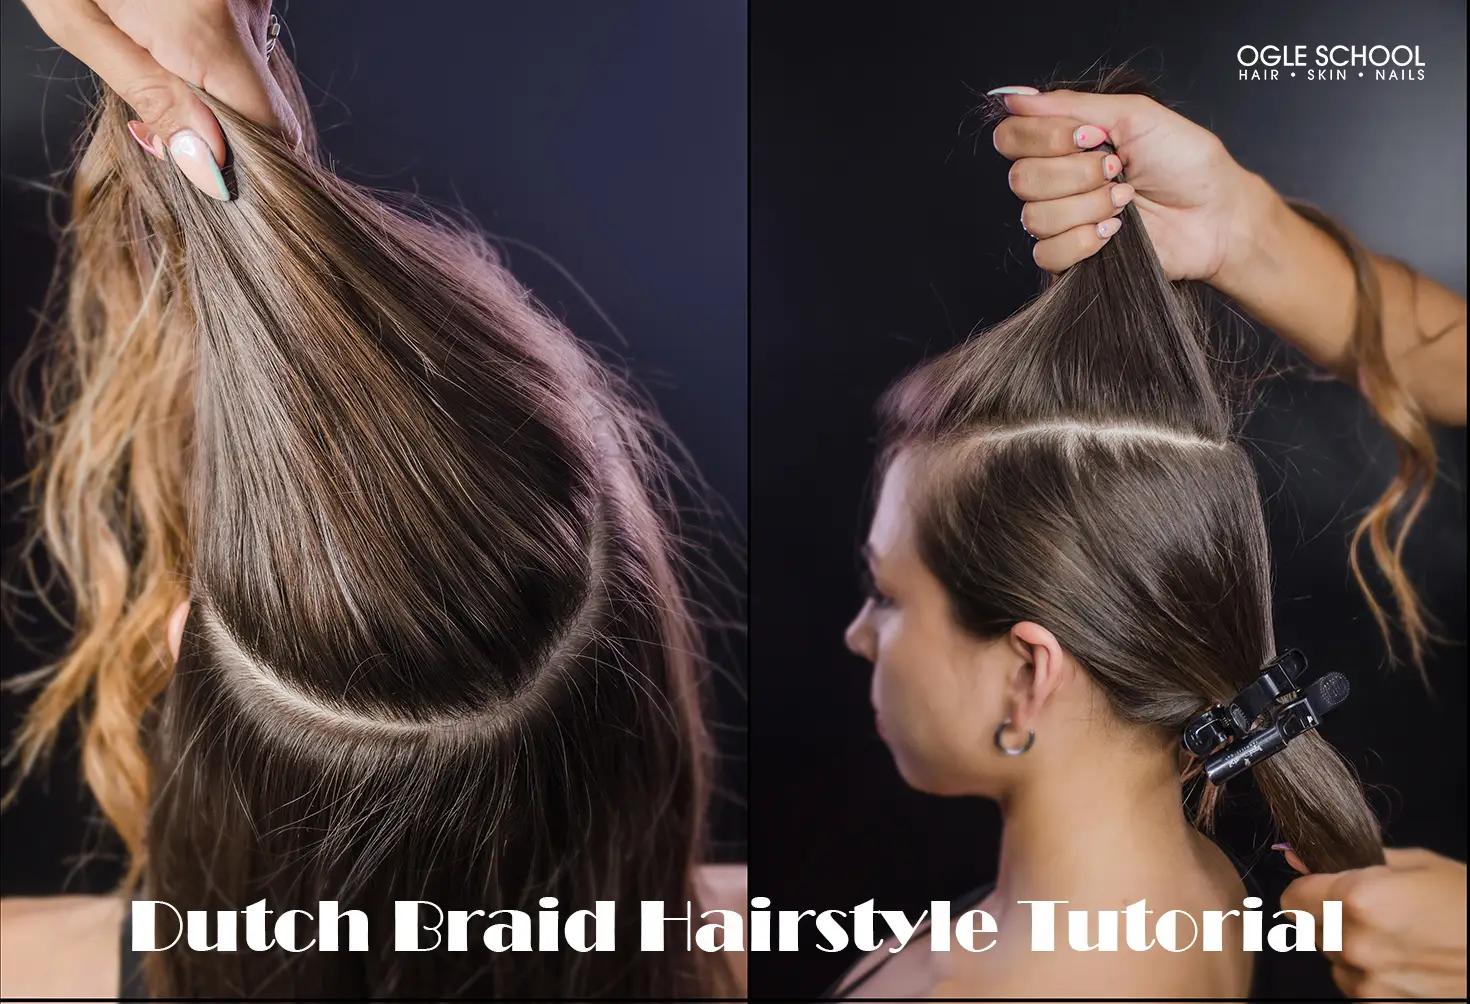
Separate the top half of the hair and the bottom half and clip the bottom portion of the hair.
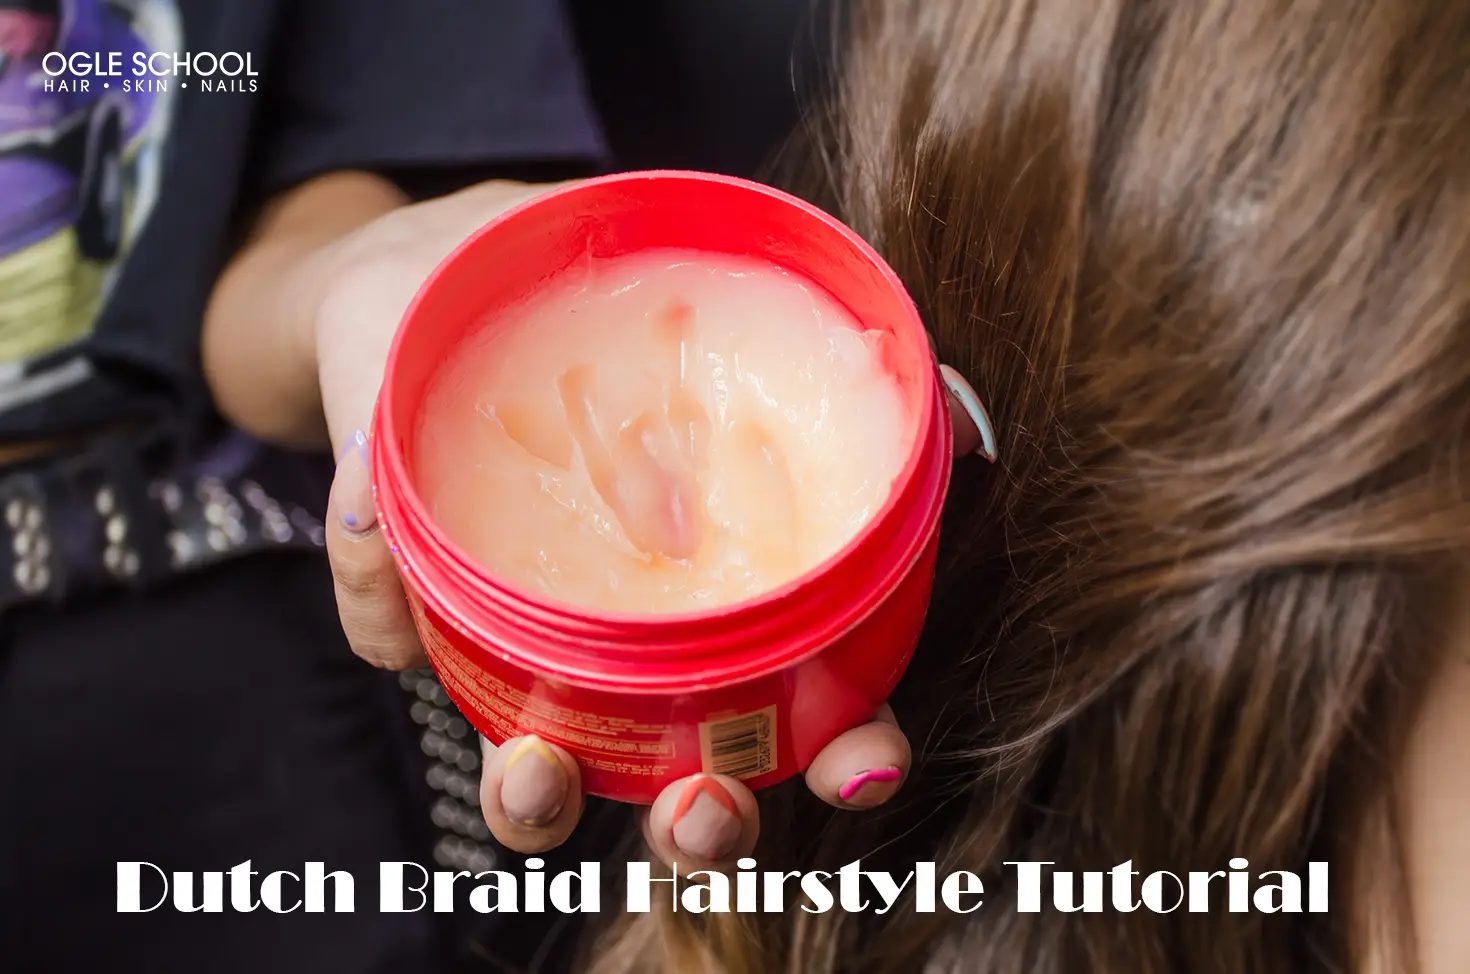
Apply a dime-size amount of shiny hair wax to dry, sectioned-off hair for a sleek look and lasting hold.
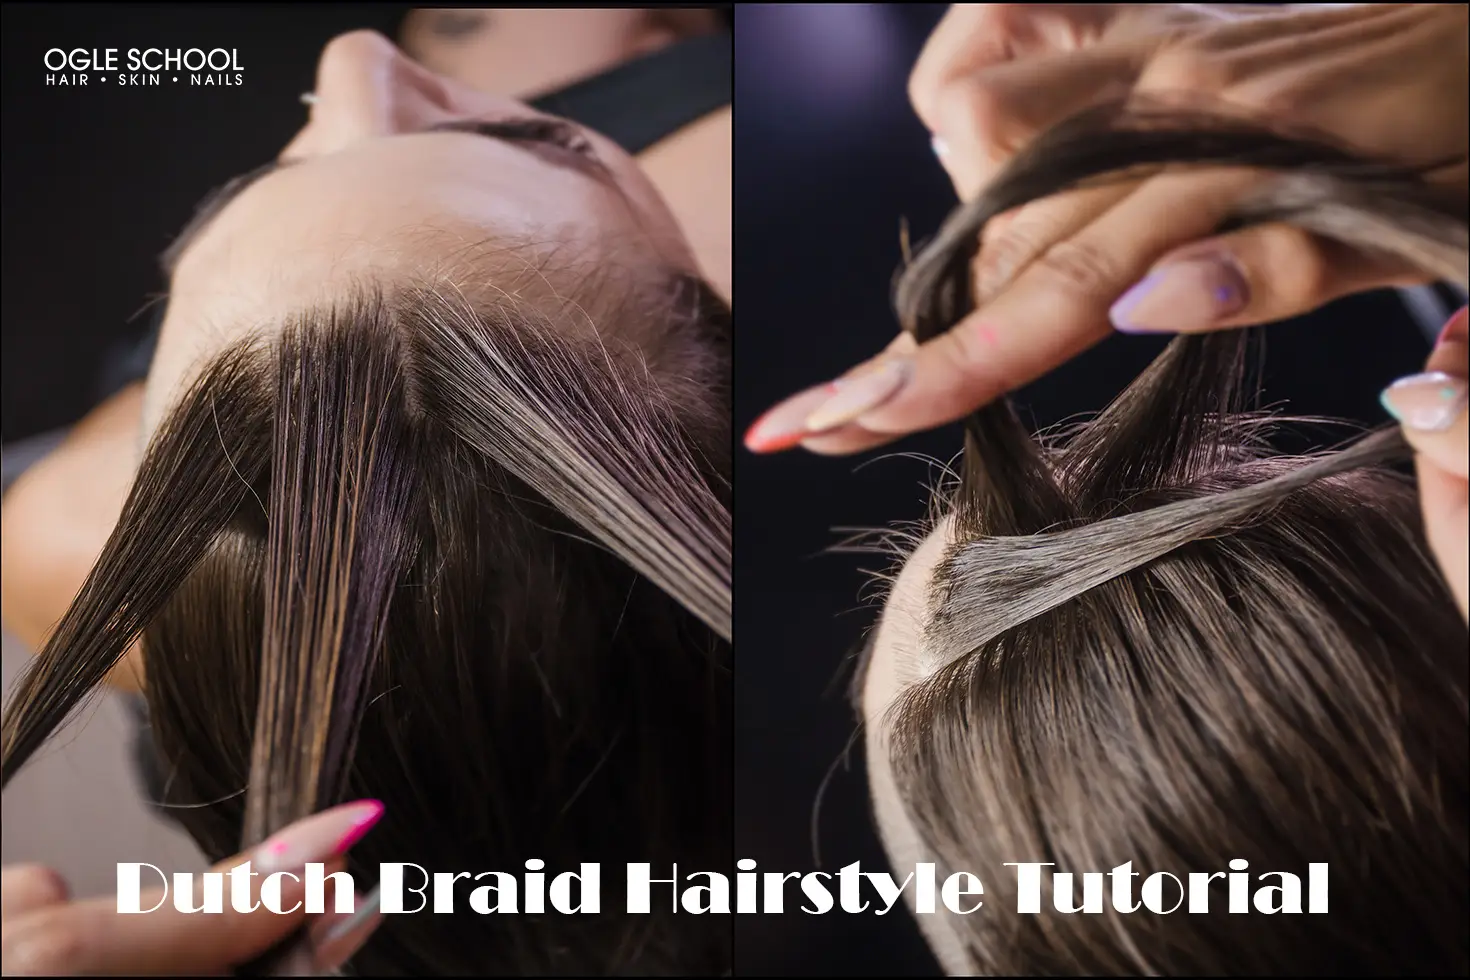
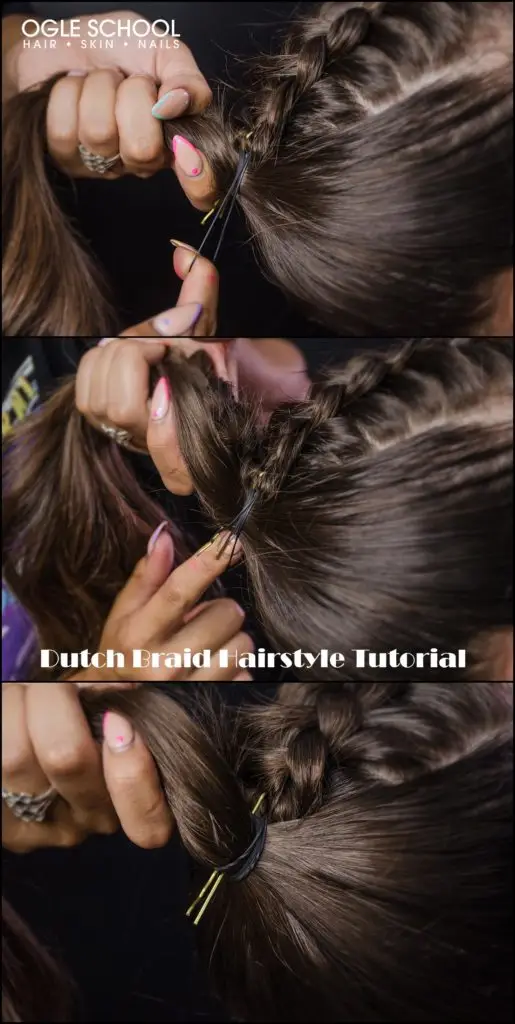
Separate the top half of hair into three even sections to begin braiding. Take the left lock of hair, passing under the middle lock toward the right direction.
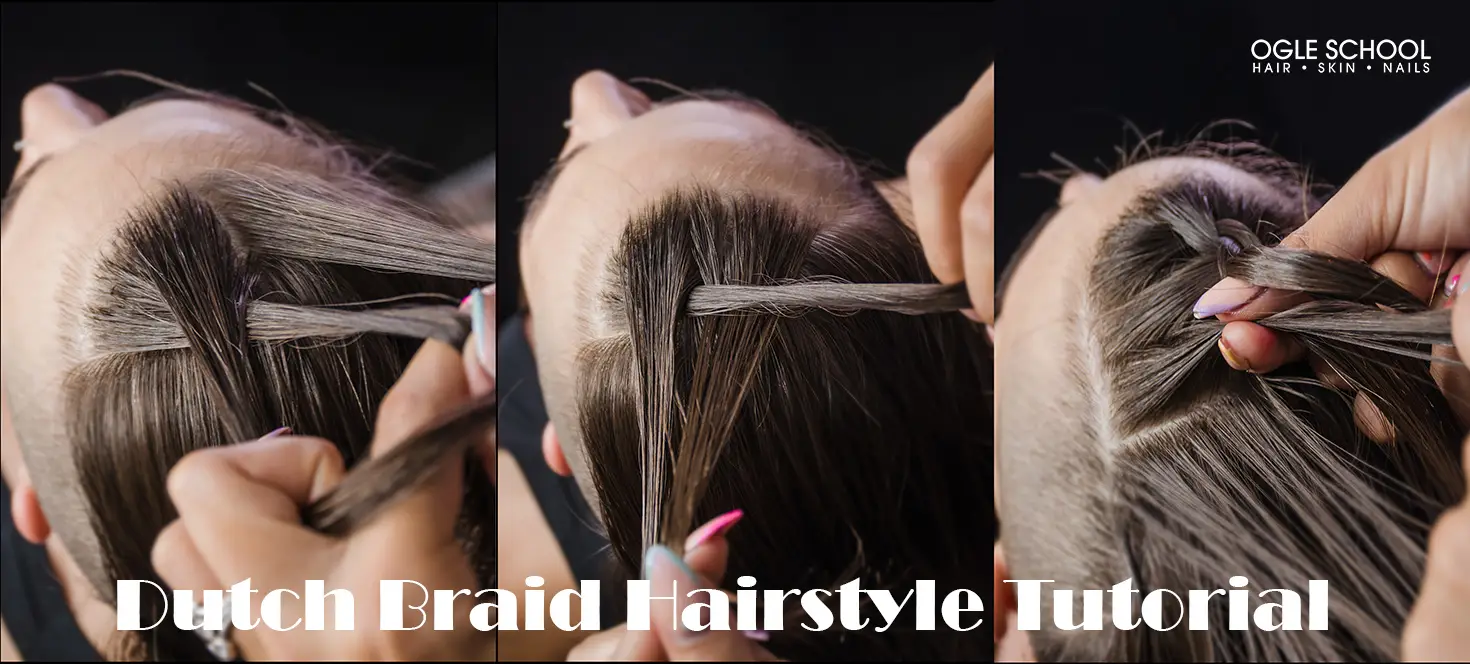
Repeat the pattern on the right side, taking the right lock under the middle. As you complete the “left under the middle, right under the middle” design, you will add a bit of hair pulling from the bottom half of the hair from the side you left off.
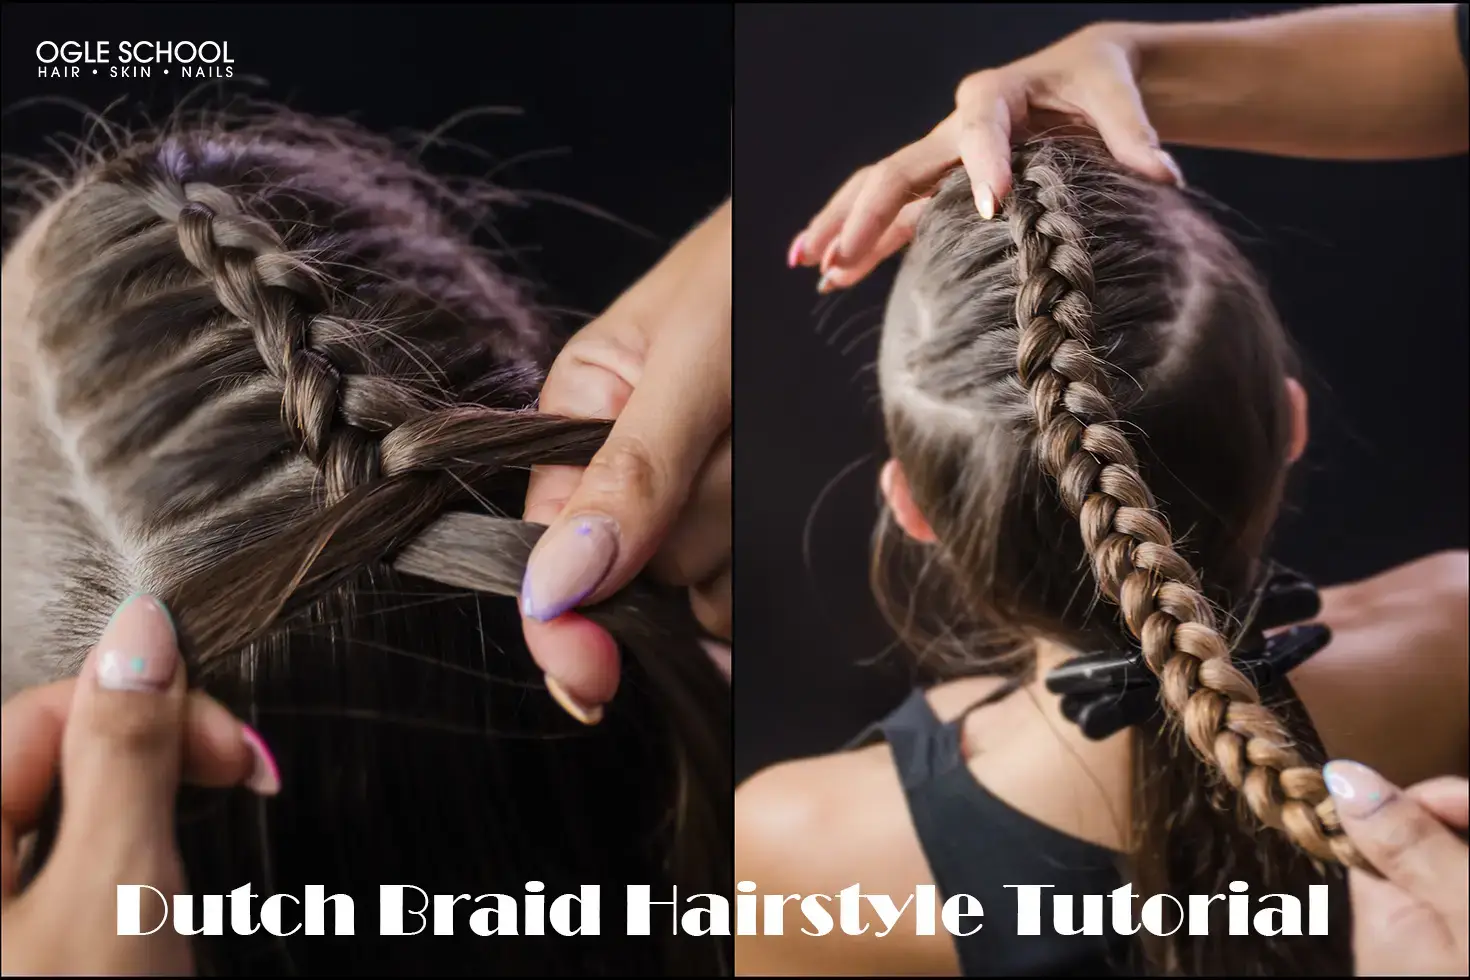
Continue this method until you’ve reached the lower part of the crown of the head region, then braid the hair without pulling from the lower section until it is complete.
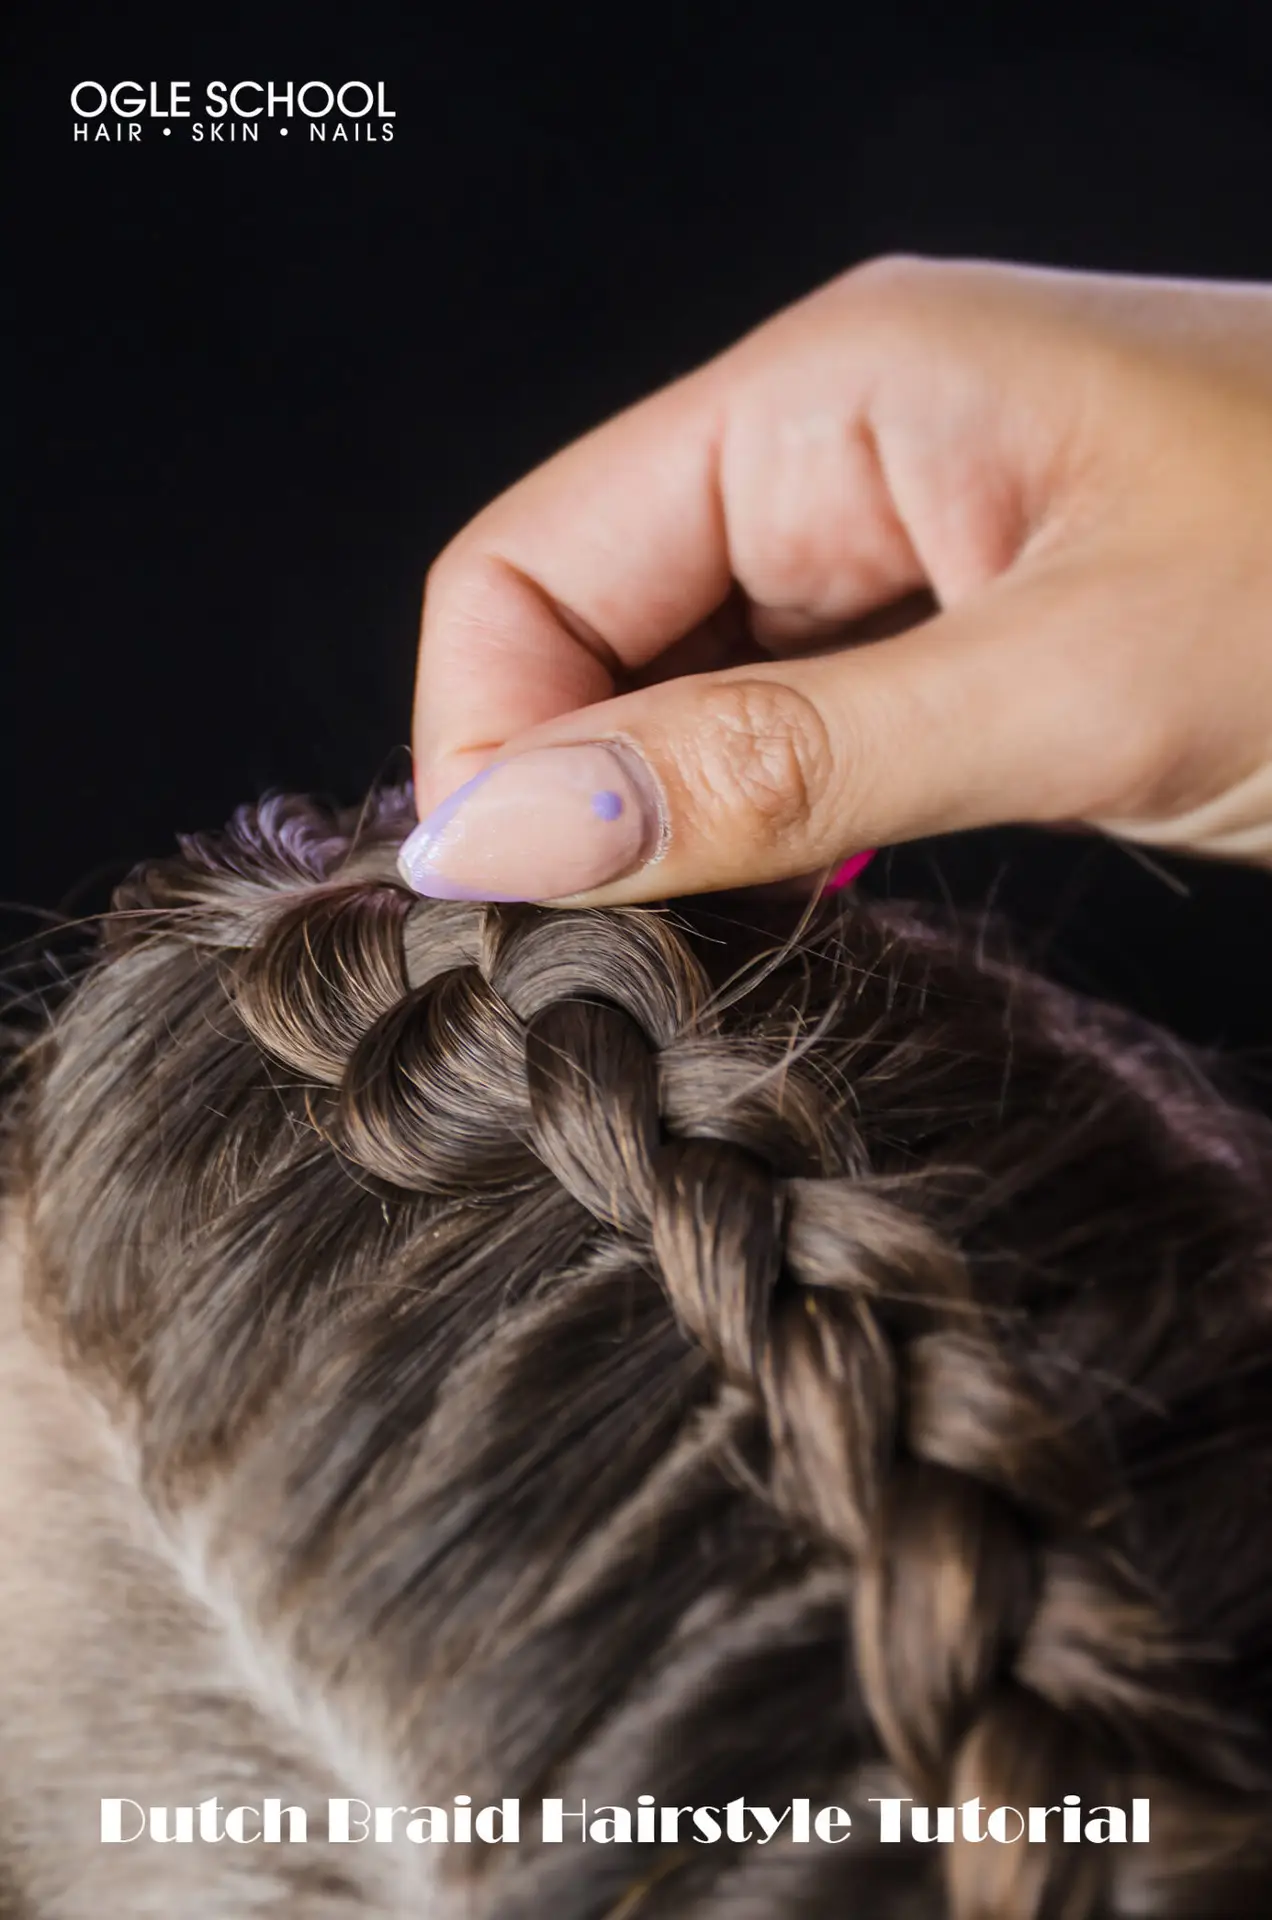
Before tying hair, gently loosen the braid using your fingers, beginning at the top and working your way down to the end of the braid.

Gather the braid and the remaining bottom half of the loose hair into a ponytail.
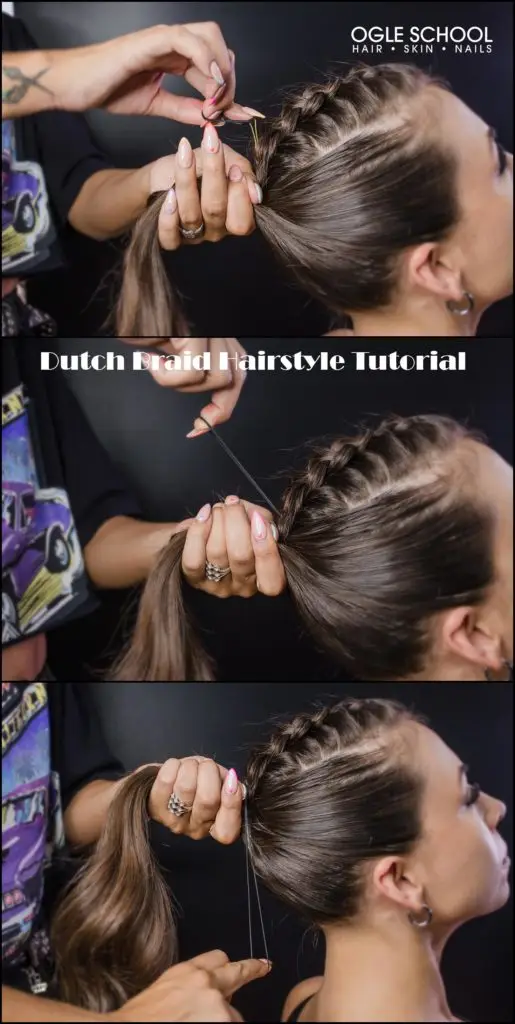
Use a small elastic band that closely matches your hair color to secure the hair.
Take the braided part of the hair and wrap it under and over the ponytail, securing the top part of the braid with a bobby pin.

Continue wrapping the braid around the ponytail and securing each section with bobby pins until complete

Finish the hair with a flexible hair spray.
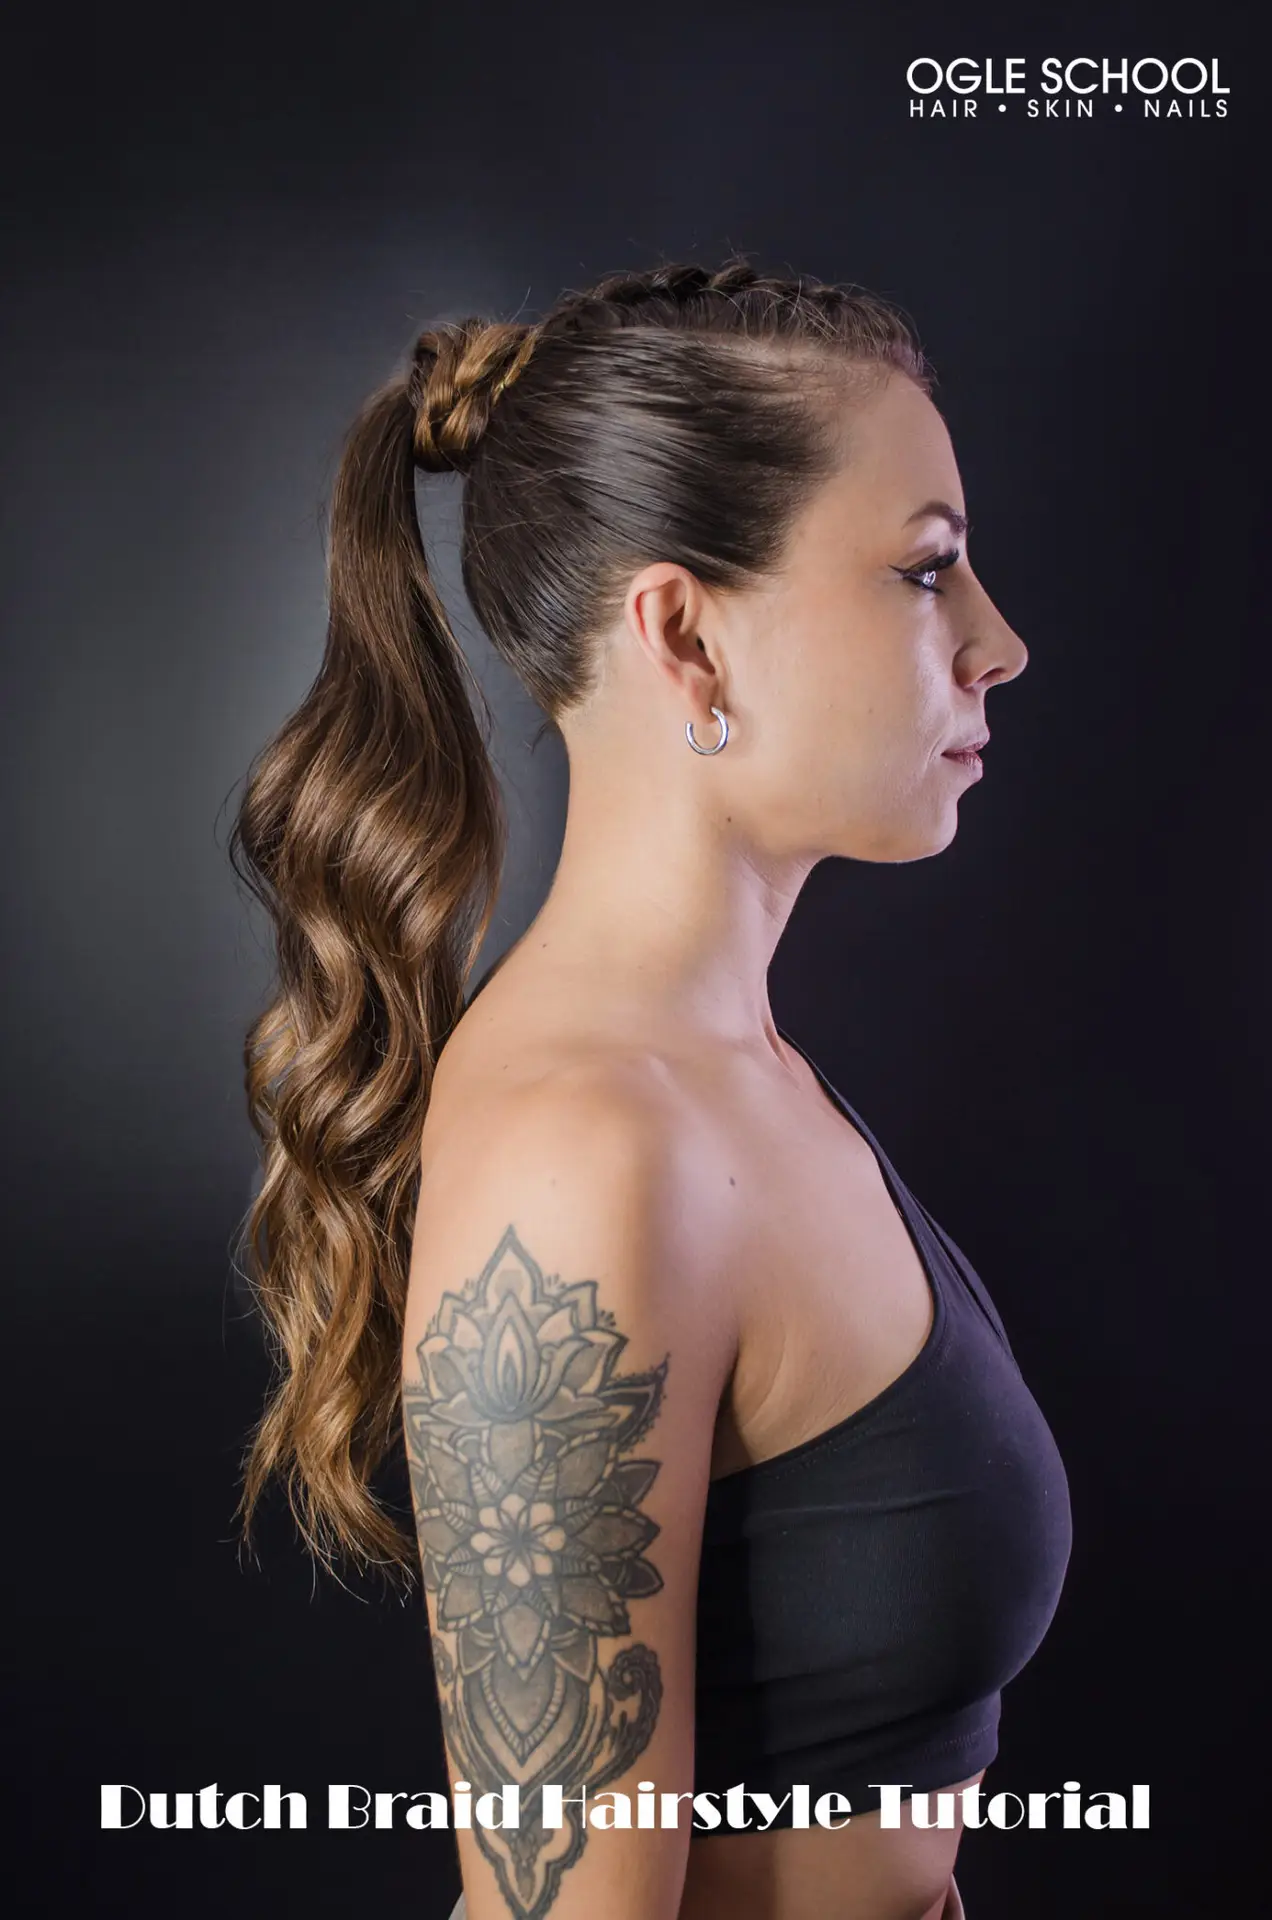
Profile of the finished style, fit for a queen!
Braiding hair is finding a flow of weaving the hair in the left-under-middle-right-under-middle pattern. Once you have mastered the braid, you can start to finesse the style with curls and wrap around ponytails.
Check out more trendy and innovative tutorials at the Ogle School Blog. Learn how to become a cosmetology student by requesting more information.