On this page
Do you want hair that’s longer and fuller? You could head to the salon for a professional treatment; or, you could change up your look with clip-in hair extensions.
As one celebrity hair stylist explains, “They are a (commitment-free) way to add length and fullness or body to your hair.”
We’ve all seen plenty of hair extension fails, both in celebrity photos and in real life. However, it isn’t difficult to get your hair extensions right if you follow a few simple rules.
In this tutorial, we’ll cover two ways to use hair extensions: a long, straight hairstyle, and a ponytail updo.
Hair Extensions Style #1: Long and Straight
To begin, let’s walk through using hair extensions for a classic look that’s long and straight.
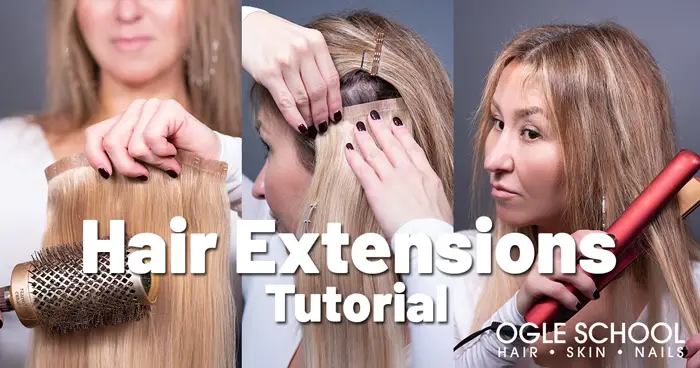
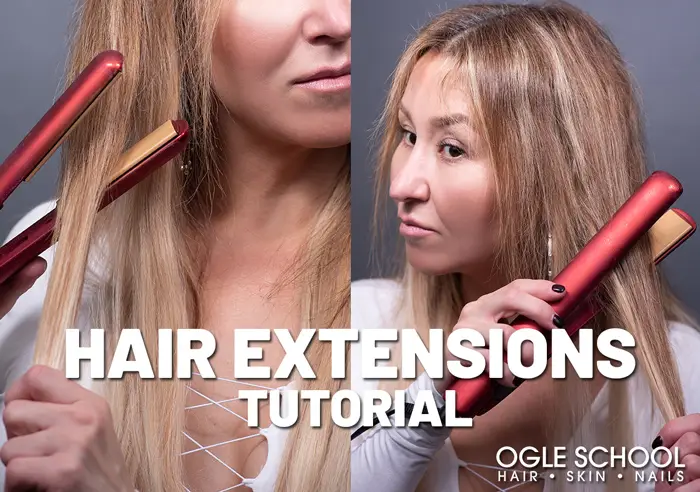
Step 1 – Brush hair extensions
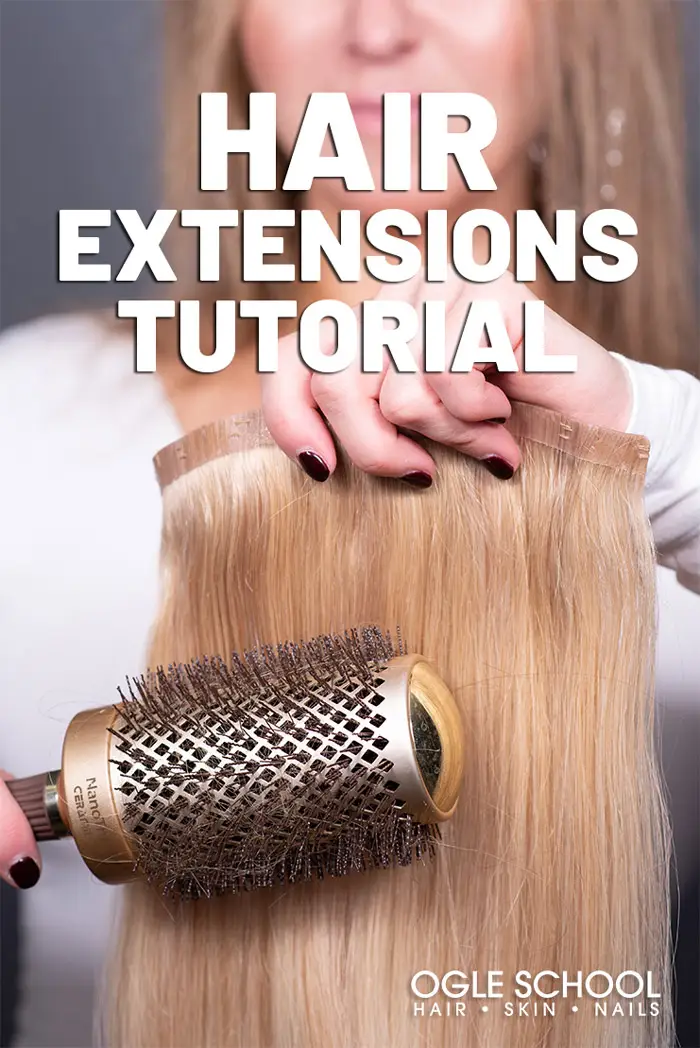
Using a round brush with fine bristles, brush your hair extensions so they’re smooth. Here, we’re using hair extensions from Luxy Hair.
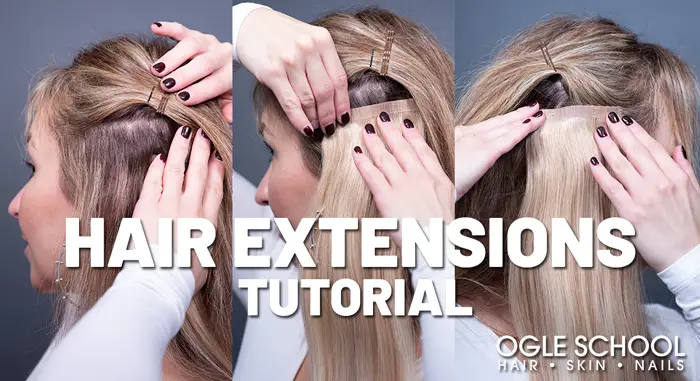
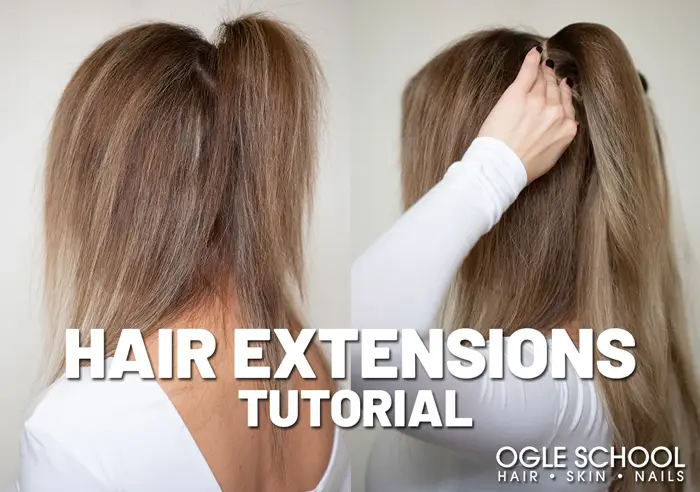
Step 2 – Prep lower layers

Create a straight part horizontally from ear to ear to separate the lower portion of your hair, and pin the remaining hair out of the way on top of your head.
Now, along the part, backcomb the lower section of hair near your scalp. This teasing adds volume and creates a tight texture that’ll hold the hair extension. Add hairspray to this area to set it.
Step 3 – Clip in the first hair extension

Along the part in your hair, clip your first layer of hair extensions into the teased hair so that it’s firmly in place.
Step 4 – Straighten and continue adding extensions
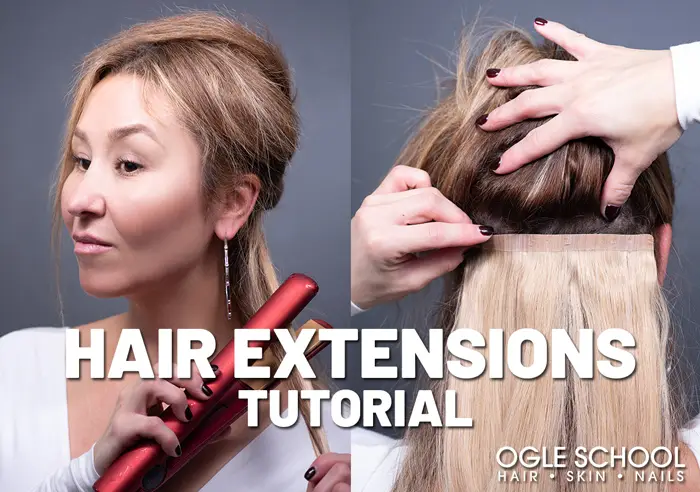
Straightening your extensions at this step ensures that your final look will lay flat. Remember that using a heat protectant spray on your extensions will prolong their lifespan.
Now, repeat the entire process by creating another part on your scalp about an inch above where the first extension was added. Backcomb your natural hair along the part line, add hairspray, and then clip in your next row of hair extensions.
Repeat until the back of your head has the length and volume that you’re going for.
Step 5 – Add side extensions
Starting at about your eyebrow line, create a short, horizontal part along one side of your head. Use the same technique of backcombing, spraying, and then clipping in the hair extension.
Now, switch sides and add in the opposite hair extension. Keep the placements even on both sides so that your final look is balanced.
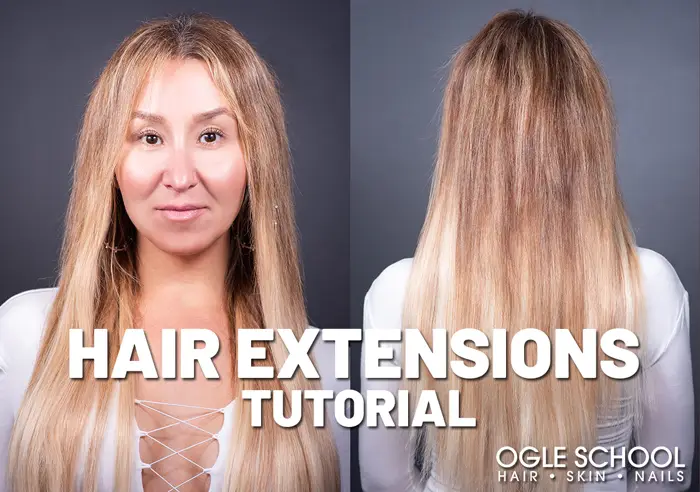
Step 6 – Straighten to style
Use a hair straightener to blend the hair extensions with your natural hair, while also creating that pin-straight look.
Here’s the final style:
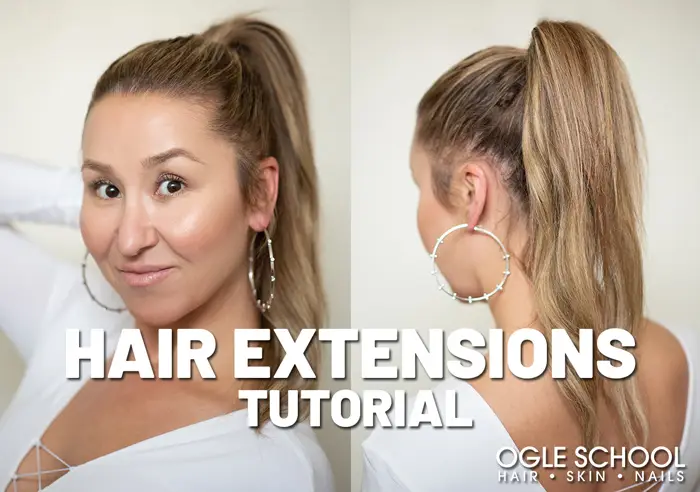
Hair Extensions Style #2: Ponytail Updo
Another great style for hair extensions is a ponytail updo. With hair extensions, even people with short hair can get a fabulous long ponytail.
Step 1 – Brush hair extensions

Begin by brushing out your extensions using a fine-bristled round brush. Here, we’re using clip-in hair extensions from BELLAMI.
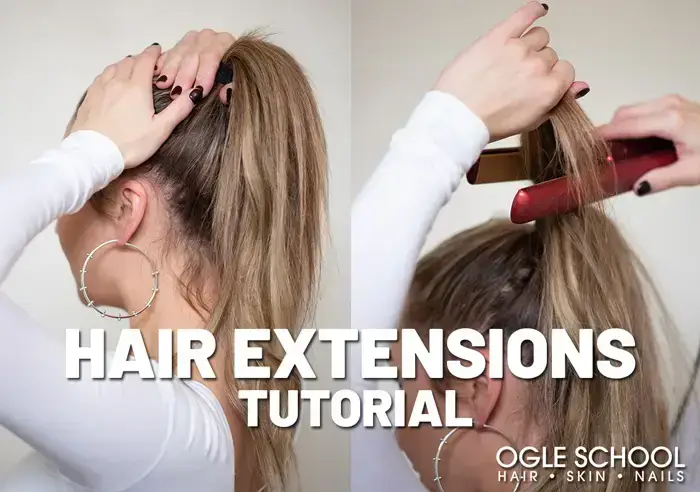
Step 2 – Attach extensions
Create a small ponytail at the crown of your head–or wherever you want your final ponytail to be–and use a rubber band to secure it.
Next, clip the extensions around your small ponytail, starting at the base and working clockwise until you’ve made a full ring.
Step 3 – Gather hair and straighten
Comb all your hair into a full ponytail, gathering the initial ponytail and the extensions. Secure with a thicker rubber band.
Use a hair straightener to smooth any flyaways. As always, use heat protectant spray to help your hair extensions last longer.
Here’s the final look:
Want to go pro with your hair styles? Students at the Texas-based Ogle School cosmetology program can graduate in as little as 11 months.