The Ombré style has straddled every artistic look from hair, nails, lips, eyes, and fashion. The aesthetic can seamlessly transition from nude and monochromatic hues, tints, and shades or pop from vampy reds to earthy and contrasty browns and burgundies.
The artful and charming Ombré look is multidimensional, sultry, and statement-making but can be artfully understated with a pale, nude color palette. When you want to make your lips pop and your skin glow, it’s all about color choices. If you have an olive skin tone, use a pigmented color, like rich pink or fuchsia. If your skin is pale, opt for a vampy red or hot pink. Or, if you want a departure from the conventional, get playful with blues, greens, and oranges.
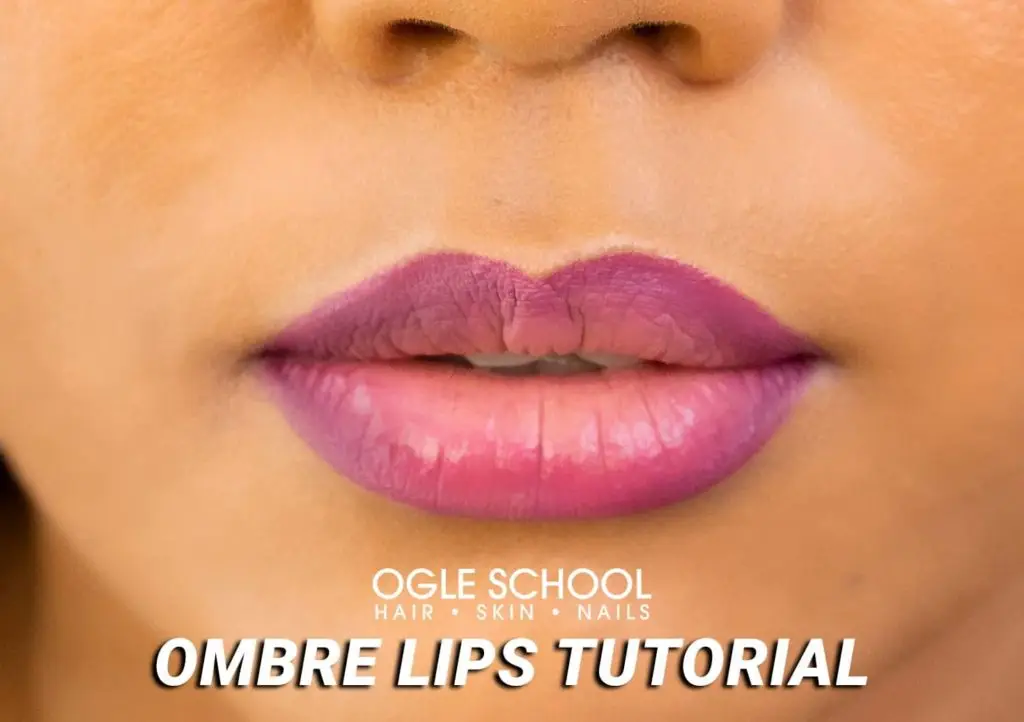
With Ombré lips, you usually trace the darkest shade on the outside, transitioning to lighter tints in the center. You’ll need the right tool for the job to blend and soften the Ombré look on your lips flawlessly.
In this guide, we’ll walk you step-by-step on how to achieve this simple, compelling Ombré Lip look. You’ll need four shades, a quality brush, and a steady hand.
Ombre is the transition of colors and hues through tints and shades from light to dark. To achieve an ombre lip effect, use different lipsticks—one that is the main color and one that is a shade lighter.
For dry, chapped, or dehydrated lips, prep your lips by applying a moisturizing lip balm for a smooth pout.

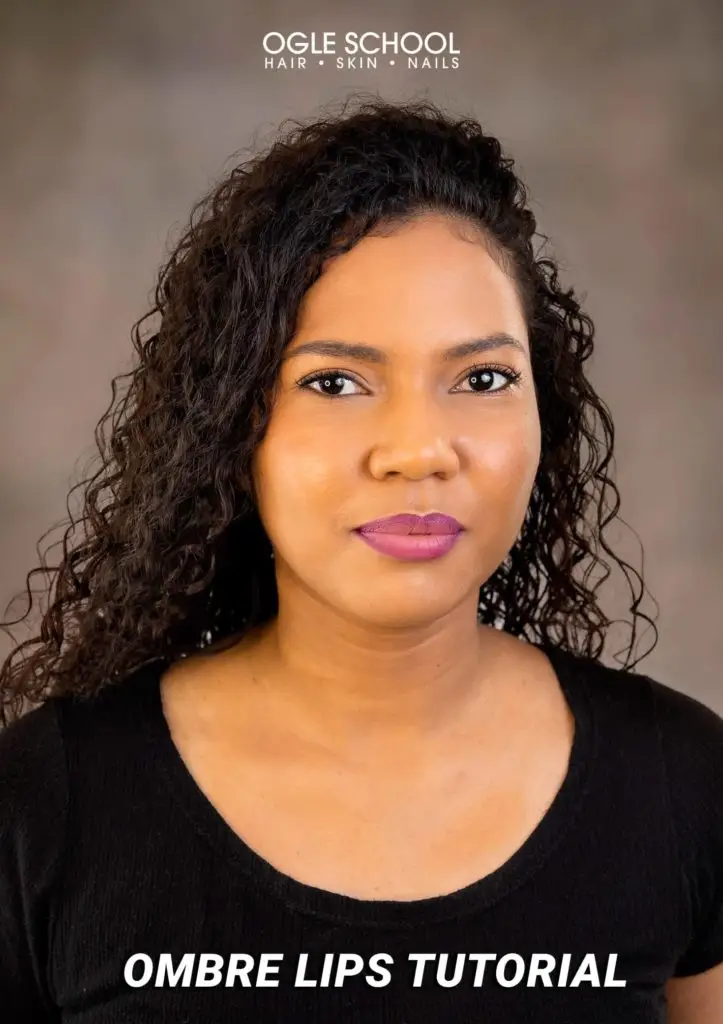
Compare the before-and-after photos, the ombre-after look makes her pout appear fuller and contrasts her face, making her complexion look brighter.

Step One: Outline the lips with a darker shade. In this tutorial, we use an NYX lip pencil (deep purple tone), both on the upper and lower lips. Starting with the upper lip, outline the lip from the outer corner until you reach the center of the lip on each side. Outline the bottom lip by swiping across from one side to the other.
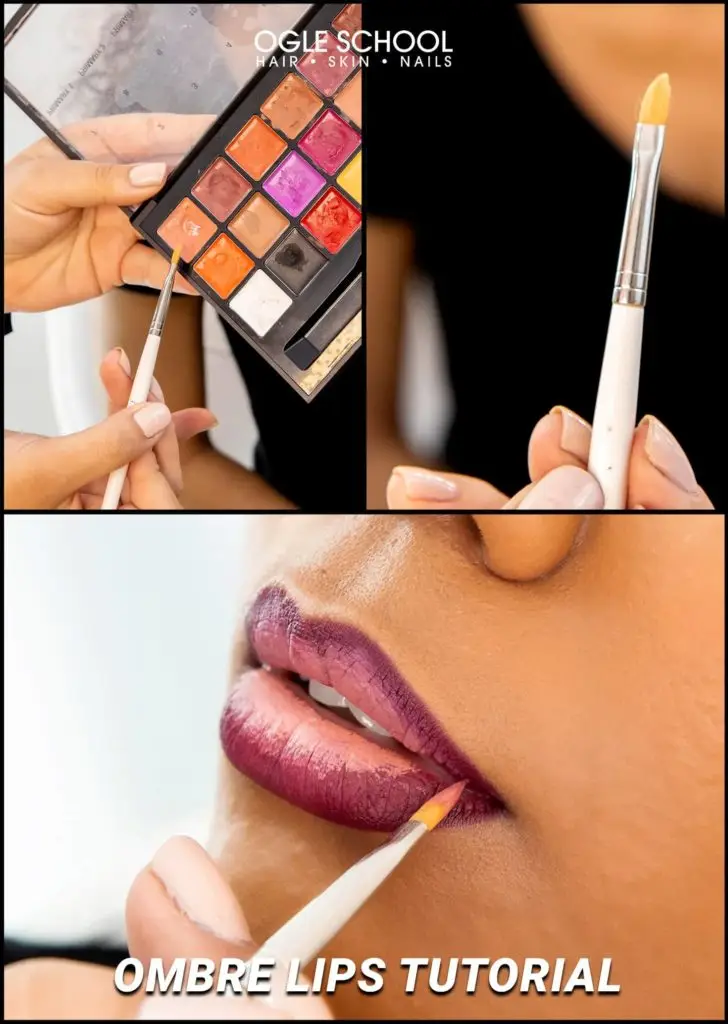
Step Two: Use a fine-point lip brush for precision, and apply a lighter shade to the center of the lips. We used the Anastasia Beverly Hills Lipstick palette (tone 1). Ideally, you want to apply a thin layer of creamy lipstick.
Blend the area where both colors meet, gently using light circular and up-and-down movements. Use a clean, quality brush to achieve a flawless blend.
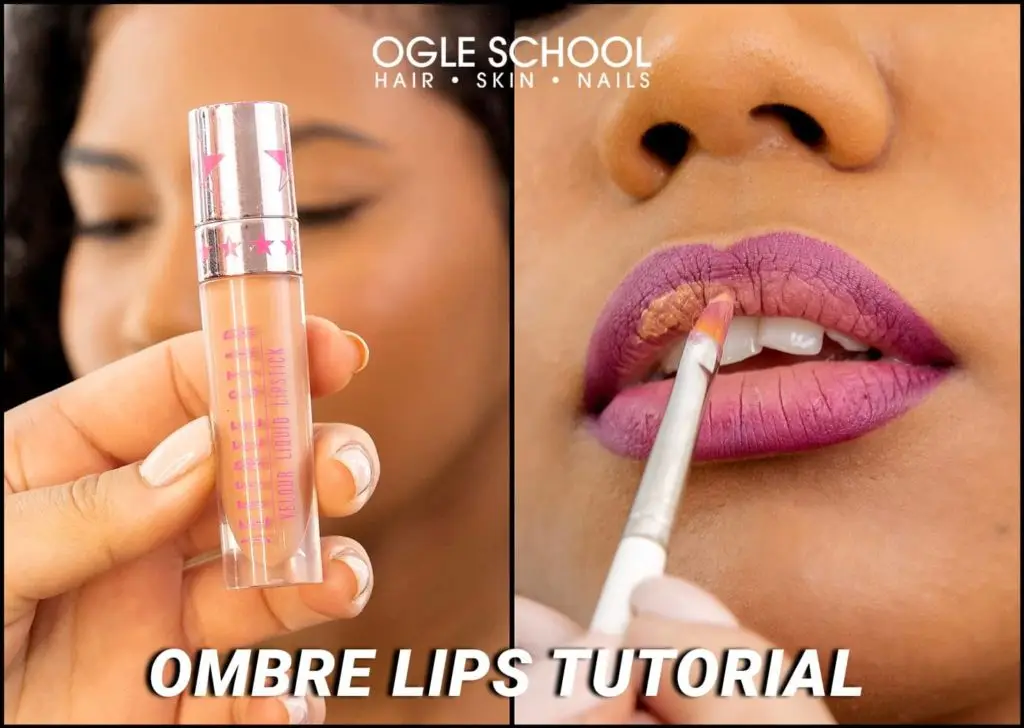
Step Three: Apply a lighter lipstick to attain that coveted, full, and dimensional ombre effect. We use Jeffree Star Liquid Lipstick (Hunty) on the center of the lips. Blend it with the outside to make your pout pop.
You can achieve a luscious, ombre pout in 20 minutes. Here’s what you need to get this look!
MATERIALS:
- Lip brush
- NYX Dark Lip Pencil (Deep Purple)
- Anastasia Beverly Hills Lip Palette (Shade 1)
- Jeffree Star Lipstick (Hunt)
Check out more of Ogle School tutorials to get the most sought-after looks.